Hi, this is step-by-step guide to Fintellect, which you can use after sign up to find answers to most of your questions.
Step 1: Sign Up
Start your registration with Fintellect at
https://app.fintellect.pro/.
1.1. Choosing Your Account Currency
The most important decision you need to make during registration (since it cannot be changed) is choosing the currency for your Fintellect account. Think about which currency is most convenient for you to record salaries, view employee rates, and plan expenses and income — and choose that one.
1.2. Entering Payment Information

We will not charge you until the end of the trial period
If you forgot to unsubscribe and were charged for the subscription — just contact us, and we will issue a refund
Fintellect will ask for your payment information during registration, but it will not charge you a single dollar because you will be in the free trial period. During this time, you have access to all Fintellect features to help you decide if it’s the right fit for you. You won’t pay anything for this.
If you don’t have enough time to test it out, or if you decide that such a fantastic money management app is not for you, and you don’t want to earn more profit from your projects — you can unsubscribe at any time. If you forget and get charged, just contact us, and we will process a refund.
Once you have registered, it’s time to explore Fintellect features.
Step 2: Calculate the Cost of Work
2.1. A Few Words About Fintellect's Philosophy
To design a landing page, write an article, manage a client's social media daily, or launch an ad set with 30 ads, you need time. If you are experienced and skilled, your time might cost more. If you are a beginner, you will have to charge less.
If a project has many unknowns, it will take more time and thus be more expensive. If it's a template-based project, you will complete it in fewer hours with less risk, making the hourly cost cheaper.
In short, everything boils down to the hours and minutes of work. Therefore, the answer to the question "how to make money in an agency" starts with time. More precisely, with its cost.
Fintellect's mission is to help you earn more profit from your projects.
To achieve this, we:
Calculate the cost of projects and all project expenses, including taxes and fees, so you understand what influences project cost growth.
Calculate the margin and profitability of projects, so you always know how much each project brought you.
The concept of the internal rate, or cost rate — the cost per hour of your team members' work — is fundamental to our architecture. If we know the cost per hour of each teammate and what affects it, we can calculate everything else.
2.2. Add Overhead Costs to the Plan
You have registered and entered the Plan. This is your main dashboard, where expenses and income from projects are synched, and where planned payments are listed.

What You Need to Know About the Plan
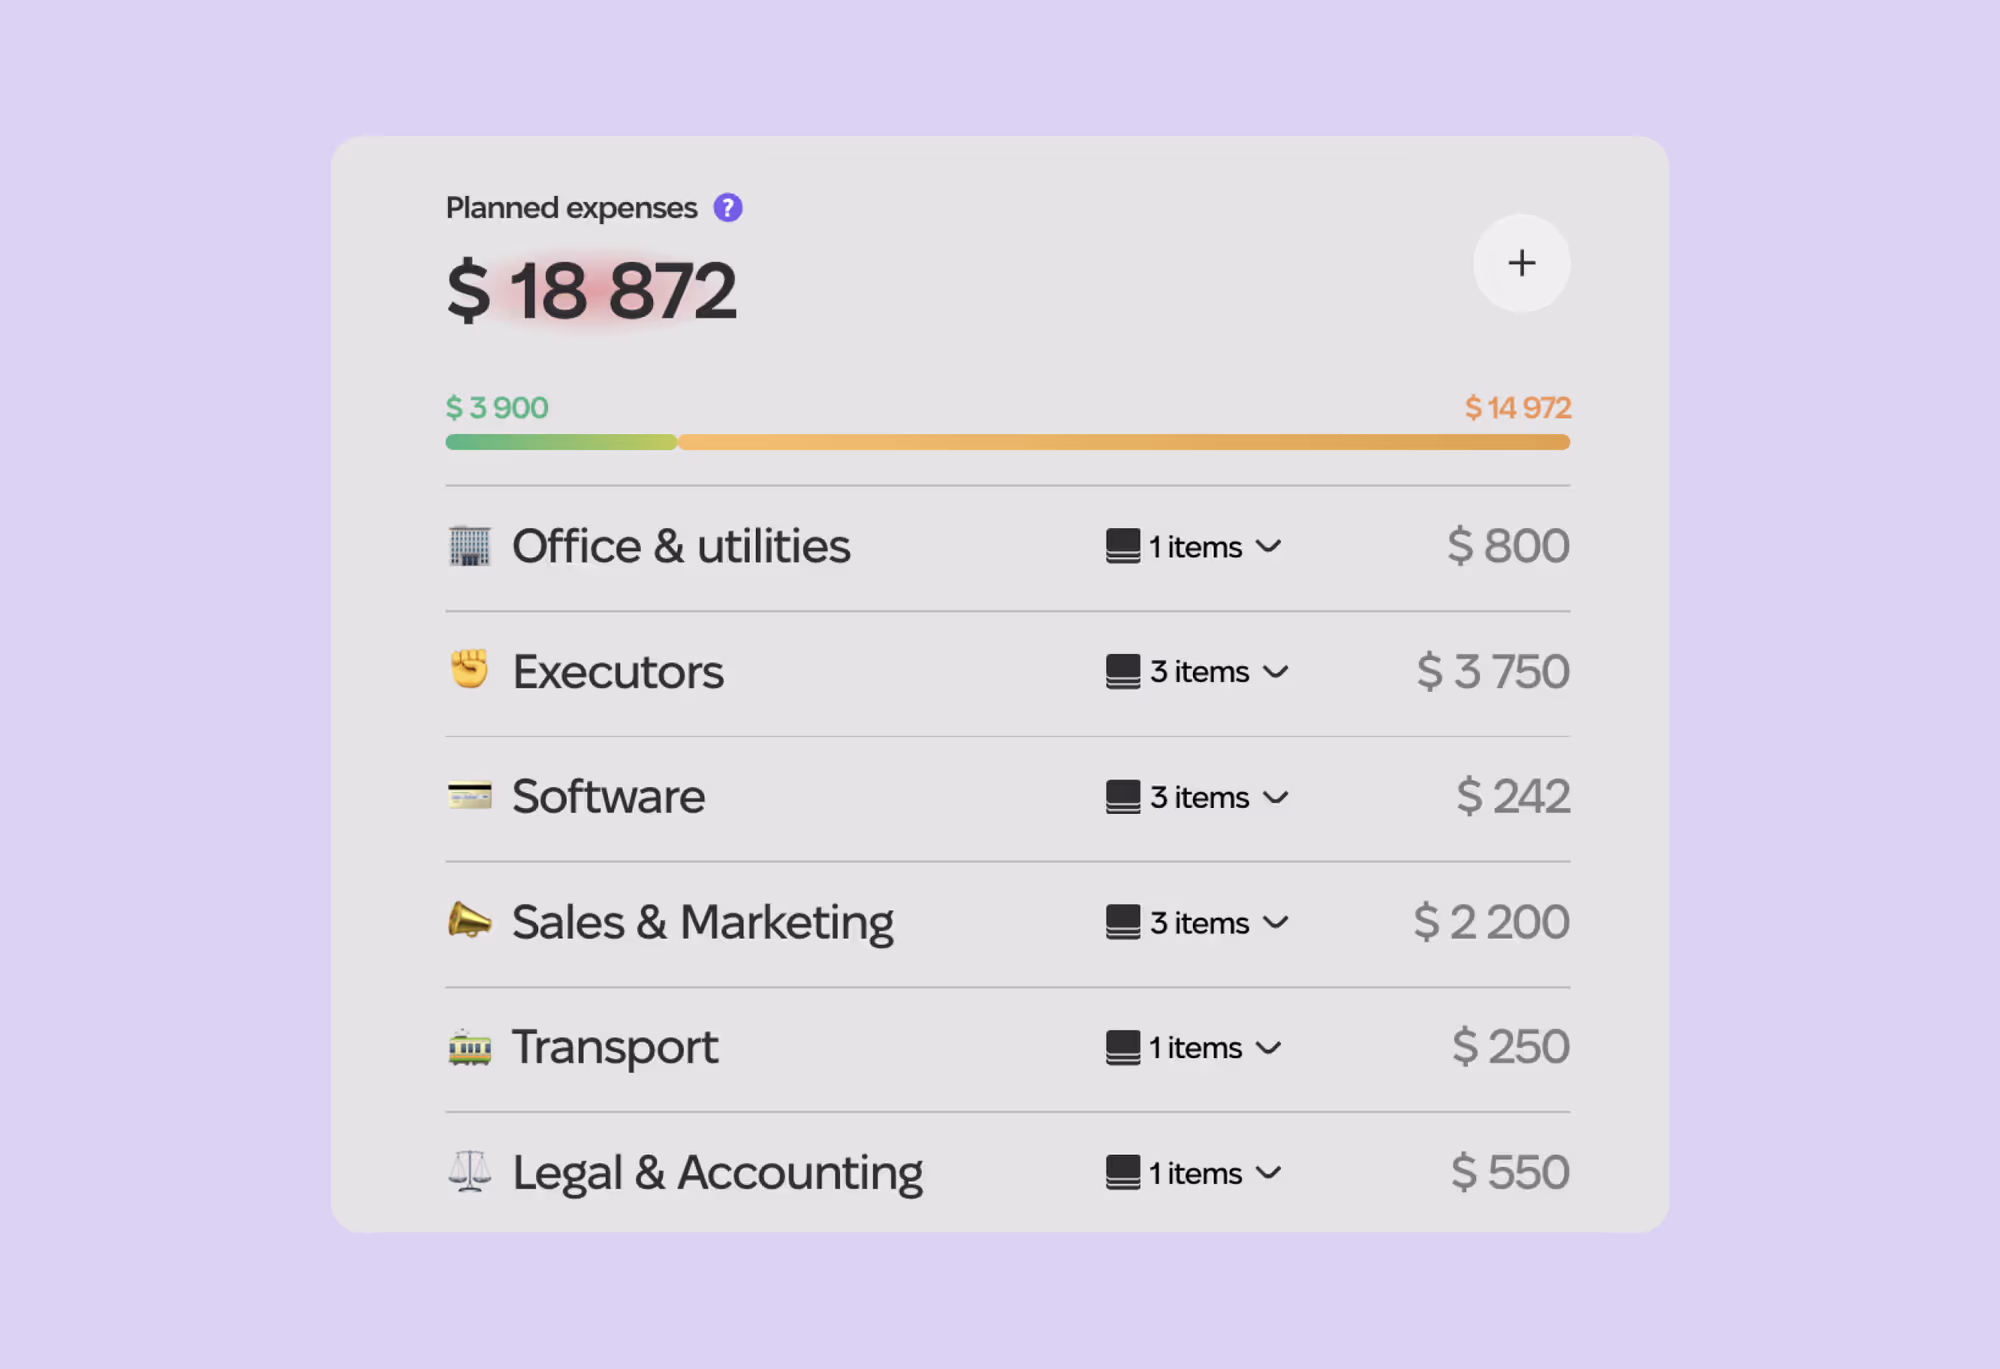
The default view of the Plan is List. This is a list of expenses and incomes divided into categories. Expenses are on the left under the heading Planned expenses. Incomes are on the right under Planned incomes.
Upon entry, the Plan opens to the current month. You can switch months by clicking on the month name or the forward-backward arrows.
To see the forecast and payment calendar, switch the Plan to Timeline by clicking the Timeline button at the top left of the screen.
To open the Plan for the year, click Annual — this button is located below the Timeline button.
Types of Overhead Costs
Overhead costs, or overheads, are your fixed expenses for resources without which the team cannot work. You pay for them regardless of client payments and project success. They include:
Office rent and office expenses
Subscriptions for work software
Equipment purchases, server costs
Marketing and sales expenses
Legal and accounting expenses
Non-billable team members (who do not perform direct work on client projects)
How to Add Overhead Costs
Do not add the team here — we will do this in the next step.
Do not add other direct costs — contractors, project expenses — we will do this during project creation.
Select a category and enter the subcategory name — for example, "office rent."
Choose the planned payment date. If this is a monthly expense, select the date and click “Repeats monthly” — the payment will be duplicated for future months.
Enter the payment amount.
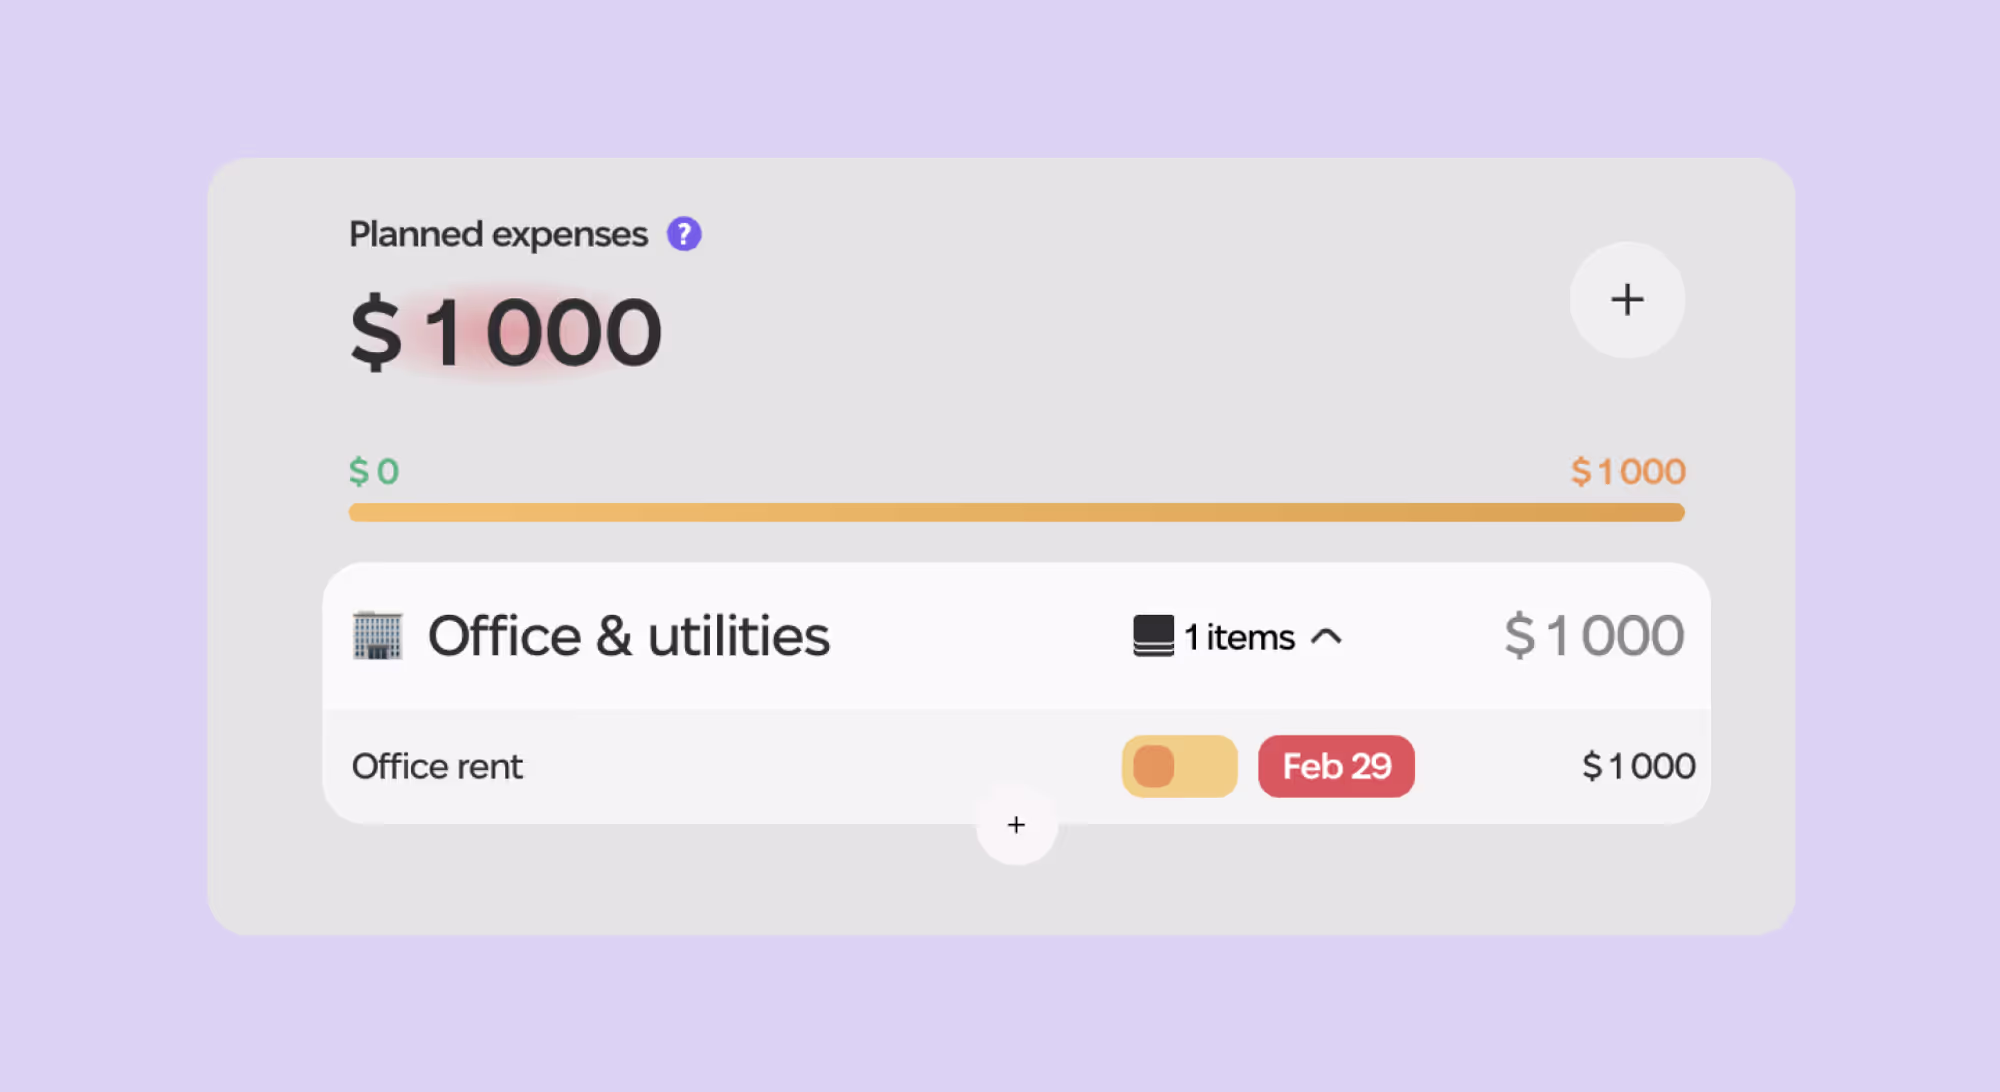
Repeat this action for all categories until you see the Planned Expenses section filled with categories and lists of overhead costs.
2.3. Add Team Members
What You Need to Know About the Team
In the Team section, you add internal team members or contractors. The difference between the two is that internal members have a salary (gross salary), while contractors do not, but they have a set internal and external rate.
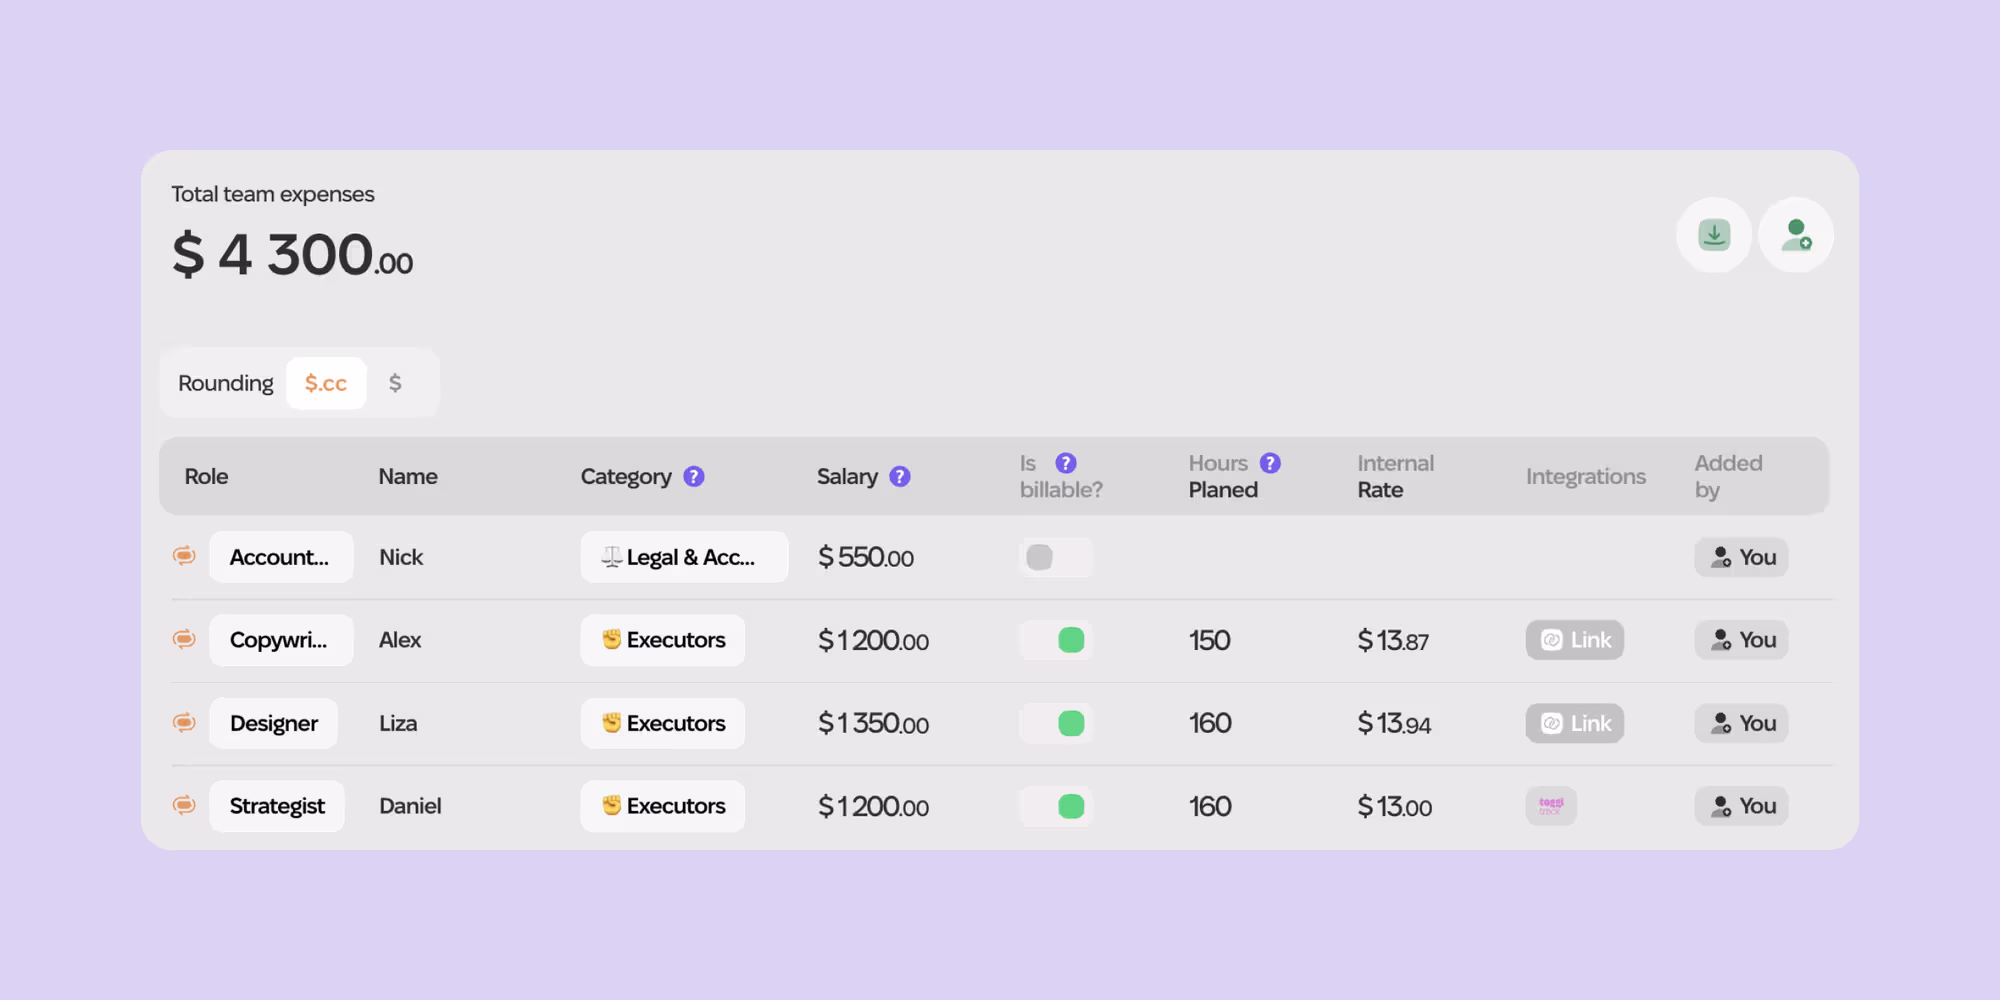
For internal team members, you need to provide the following information:
Role: the person's function, position
Name
Category: these are financial categories synchronized with the Plan to ensure team expenses fall into the correct expense category.
Salary: net, including salary taxes.
Billable/Non-billable: Billable are direct performers in client projects for whom we calculate the internal rate. Non-billable are accountants, managers, HR, and other team members who do not perform work in client projects.
Planned hours for Billable team members.
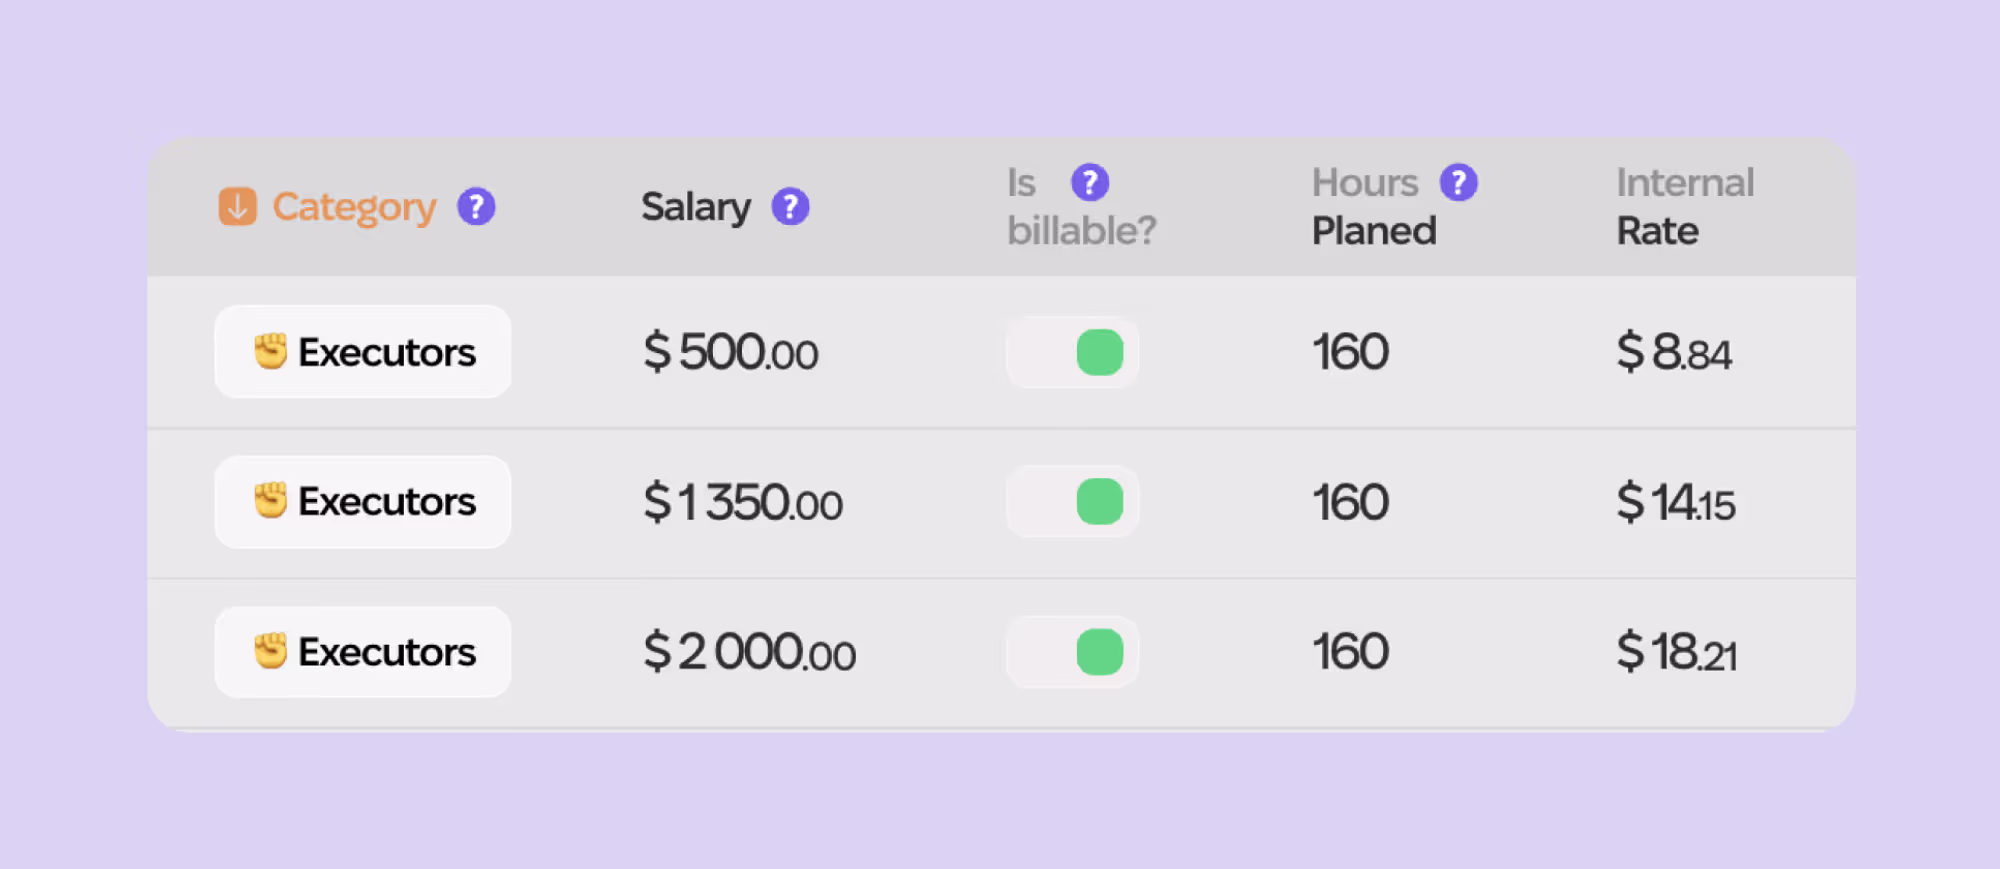
Internal rate: calculated automatically for Billable team members.
Integration with the time tracker.
For contractors, you provide almost the same information, except for Salary and Category — as the category is added automatically.
How the Internal Rate is Calculated for Internal Team Members
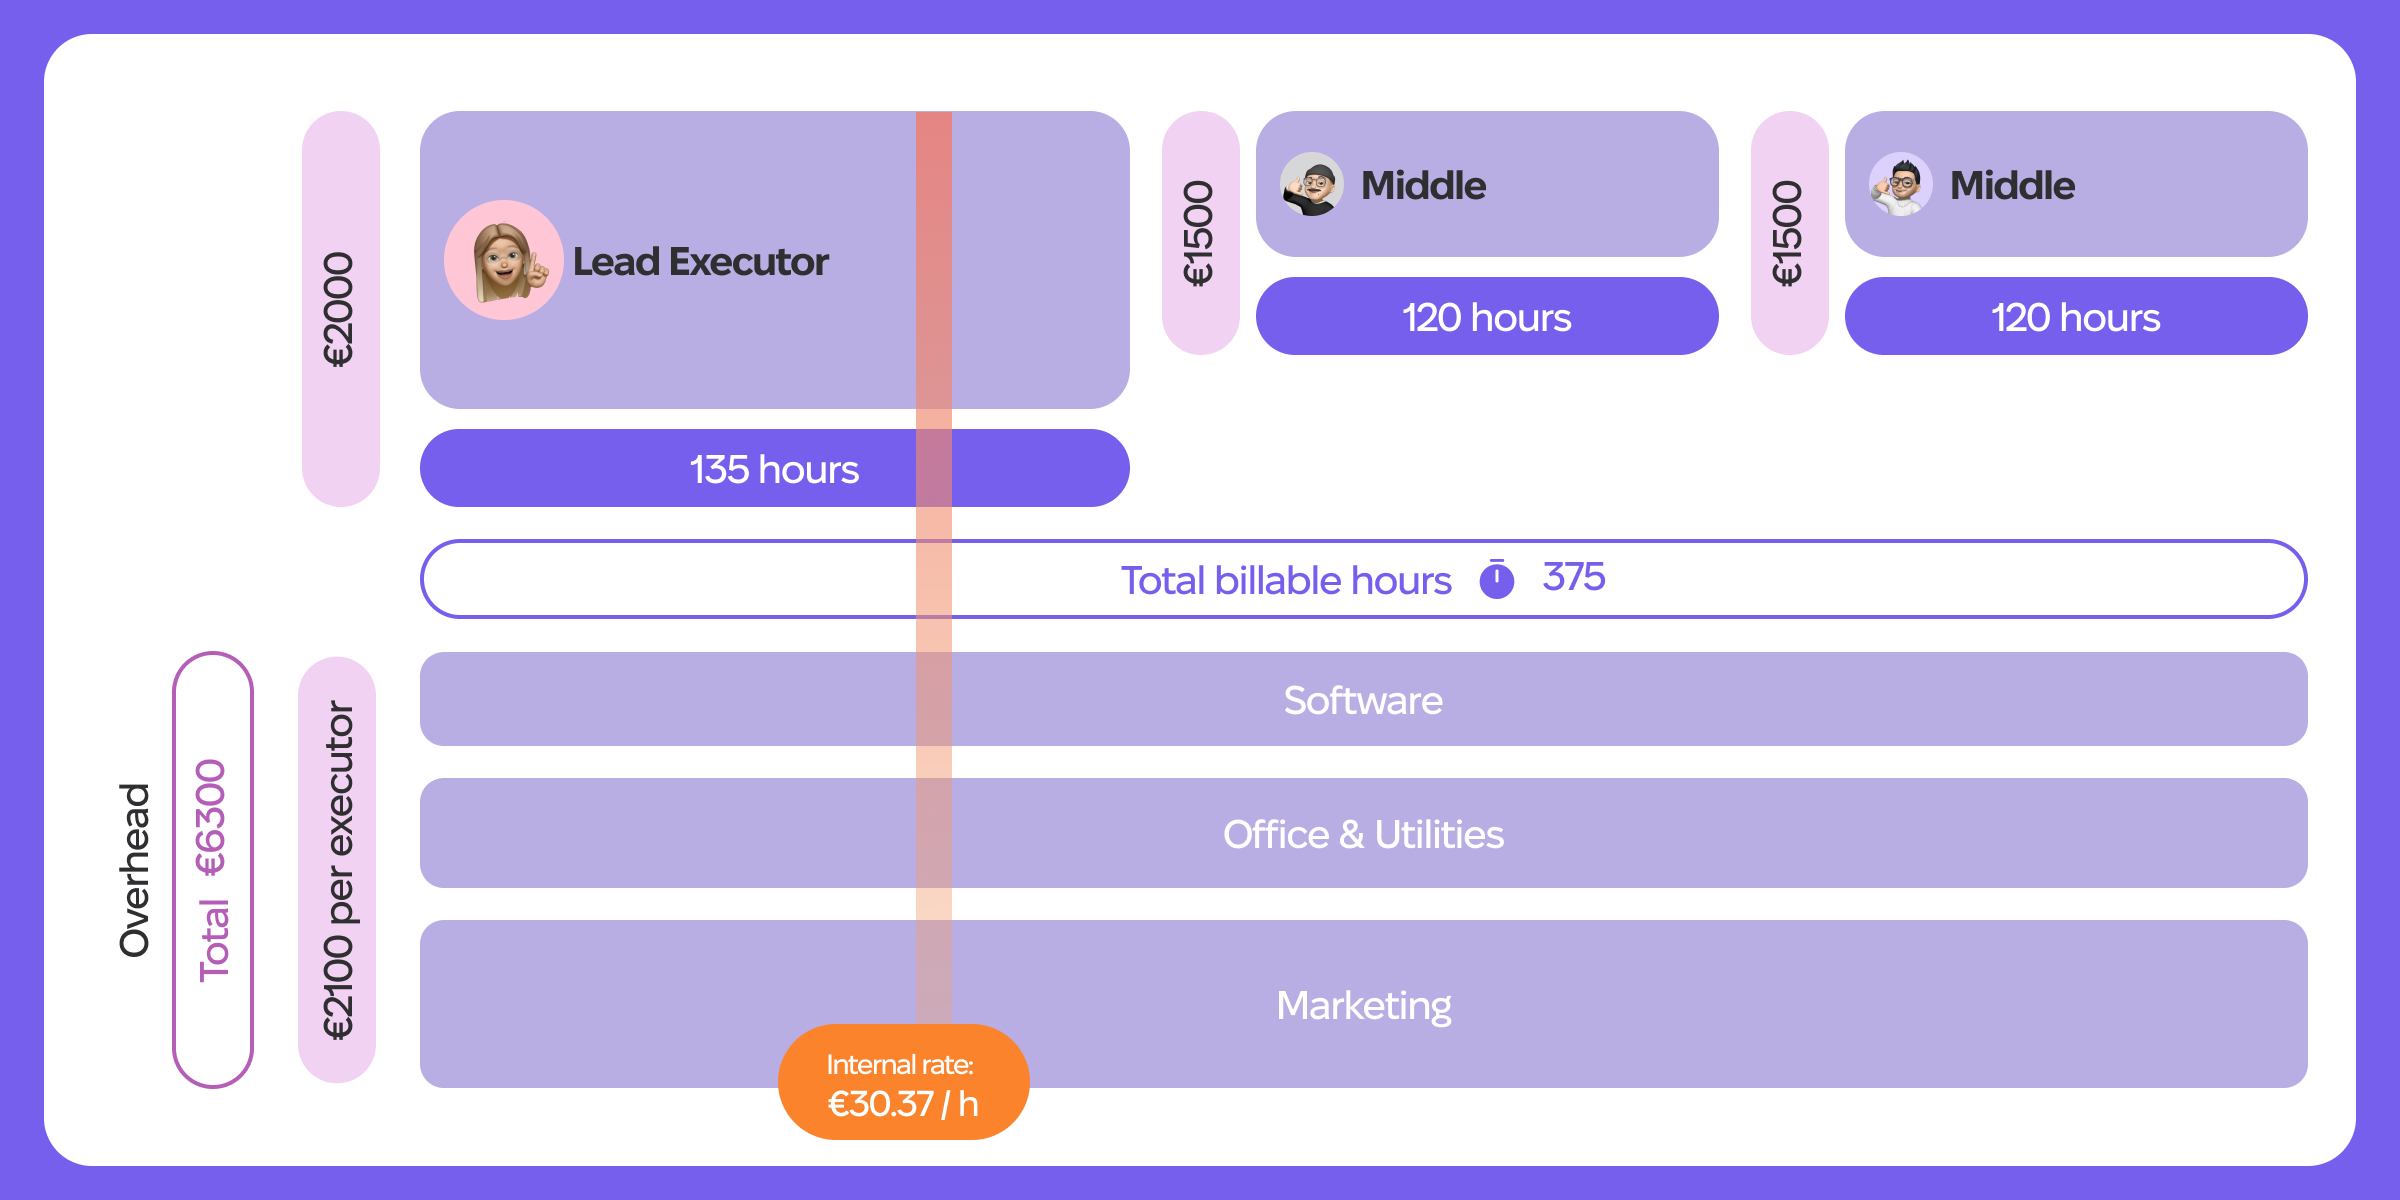
The internal rate is the cost per hour of work for each team member. This is essential for understanding the cost structure and profitability of your projects. The internal rate takes into account the gross salary, planned hours, and other related expenses to determine the cost of each hour worked by your team members.
The internal rate includes the executor's salary and a share of the overheads. Overheads are evenly distributed among the direct performers and factored into the internal rate, so the cost per hour includes overhead costs.
How the Internal Rate is Calculated for Contractors
It isn't calculated; you simply enter manually how much you pay per hour for the contractor. You can also calculate the contractor's cost as a fixed price for the project and pay them a fixed fee for their work.
How Overheads are Calculated
The total overheads for each month are displayed in the Overheads widget at the top of the Team section. Overheads include:
Overhead costs from the Plan section (all except direct costs — contractors, project expenses, etc.)
Salaries of non-billable team members.
Add team members manually or import them from a time-tracking app.
To add team members manually, click the "Add" button (with a person icon).
To import team members, click the "Import" button to the left of the "Add" button. Then select the app and import the team members.
Instructions for connecting project management or time-tracking apps are in the next section.
Fill in the information for each team member:
To select a role, first create it. Keep in mind that each role exists within a financial category, so create designers and developers in the Executors category, and accountants in the Legal & Accounting category.
Divide team members into billable and non-billable. Hours and internal rates exist only for billable team members. Only billable team members can be added as executors in a project.
Specify the planned number of working hours for billable team members. The maximum number of hours without breaks or sick leave is 168 (8 effective working hours per day). Usually, no one works that effectively, so we recommend setting it to 120-140 hours.
2.4. Check the Internal Rate
Once all team members are added and overheads are calculated, Fintellect will automatically calculate the internal rate for internal billable team members in the Internal rate column. Using this, we can calculate the cost of the team's work in projects.
Note that overhead is not included in the internal rate for contractors (because with the current architecture, this is not possible).
Step 3: Create Your First Project
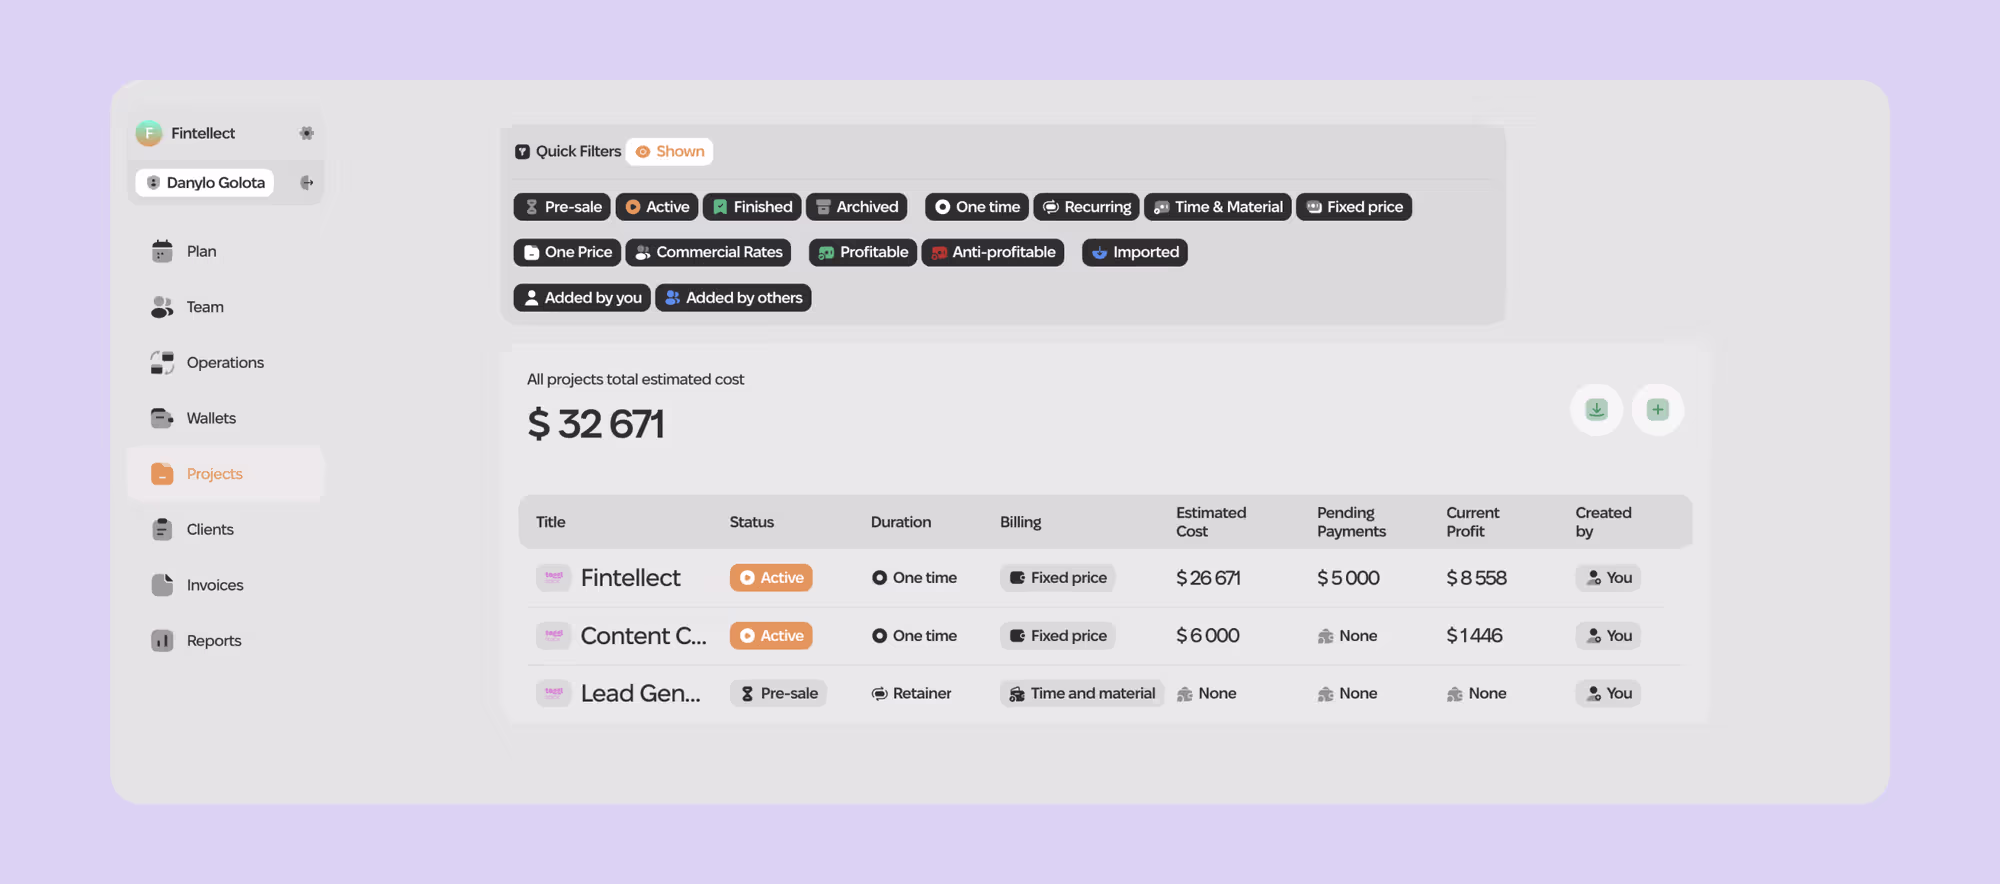
3.1. How a Project Works in Fintellect
A project in Fintellect functions just like it does in your business. It includes:
Estimate — project components, including team work, contractors, project expenses, taxes, and fees. The Estimate section helps you quickly calculate the actual cost and structure of project expenses.
Production — a section where project expenses are tracked as the work progresses.
Client Checks — client payments for the project or sprint, where you can quickly create invoices.
When you create a project, you go through the setup and estimation phase. Once the project starts, it moves to the Production stage, where you track changes in the cost and profitability of the project as work progresses.
To calculate the project estimate, you need to set up the team, overheads, and calculate internal rates for team members. If you don't have team members and work only with contractors, you can skip the team addition step, but do not skip adding overheads.
3.2. Set Up the Project Financial Model

Duration
One time — a one-time project with a specific start and end, one estimate, and one price.
Retainer — a project with recurring parts, which we call sprints. Each sprint has its own estimate, cost, and expenses. This format is suitable for projects where the client pays monthly or for projects with several separate parts.
Client Billing
Fixed Price — a fixed project cost that Fintellect calculates considering the cost and expenses.
Time & Material — a project with a flexible price that depends on the actual hours worked.
Price calculation
One project price — you set the final project price and its margin.
Commercial rates — the project price is calculated automatically based on commercial rates.
To understand how each project works, create several test projects with the settings you most often use in your current work. This will be more effective than any textual guide.
3.3. Add General Project Settings

This part is straightforward: specify the client by selecting them from the list or adding a new one, indicate the project duration, and connect a time-tracking app if needed.
The most important step here is specifying the client, do not skip this step.
3.4. Calculate the Estimate
Add Team Cost (Team Work)

You can add billable team members to the team. For each member, Fintellect will automatically pull the internal rate from the Team section.
The team’s work estimate is calculated in hours. You can allocate any number of hours to the project or sprint.
Fintellect calculates the total cost of the team's work and the cost for each team member separately.
If the project estimate is based on commercial rates, you need to specify the commercial rate for each team member that you sell to the client.
Add Contractors
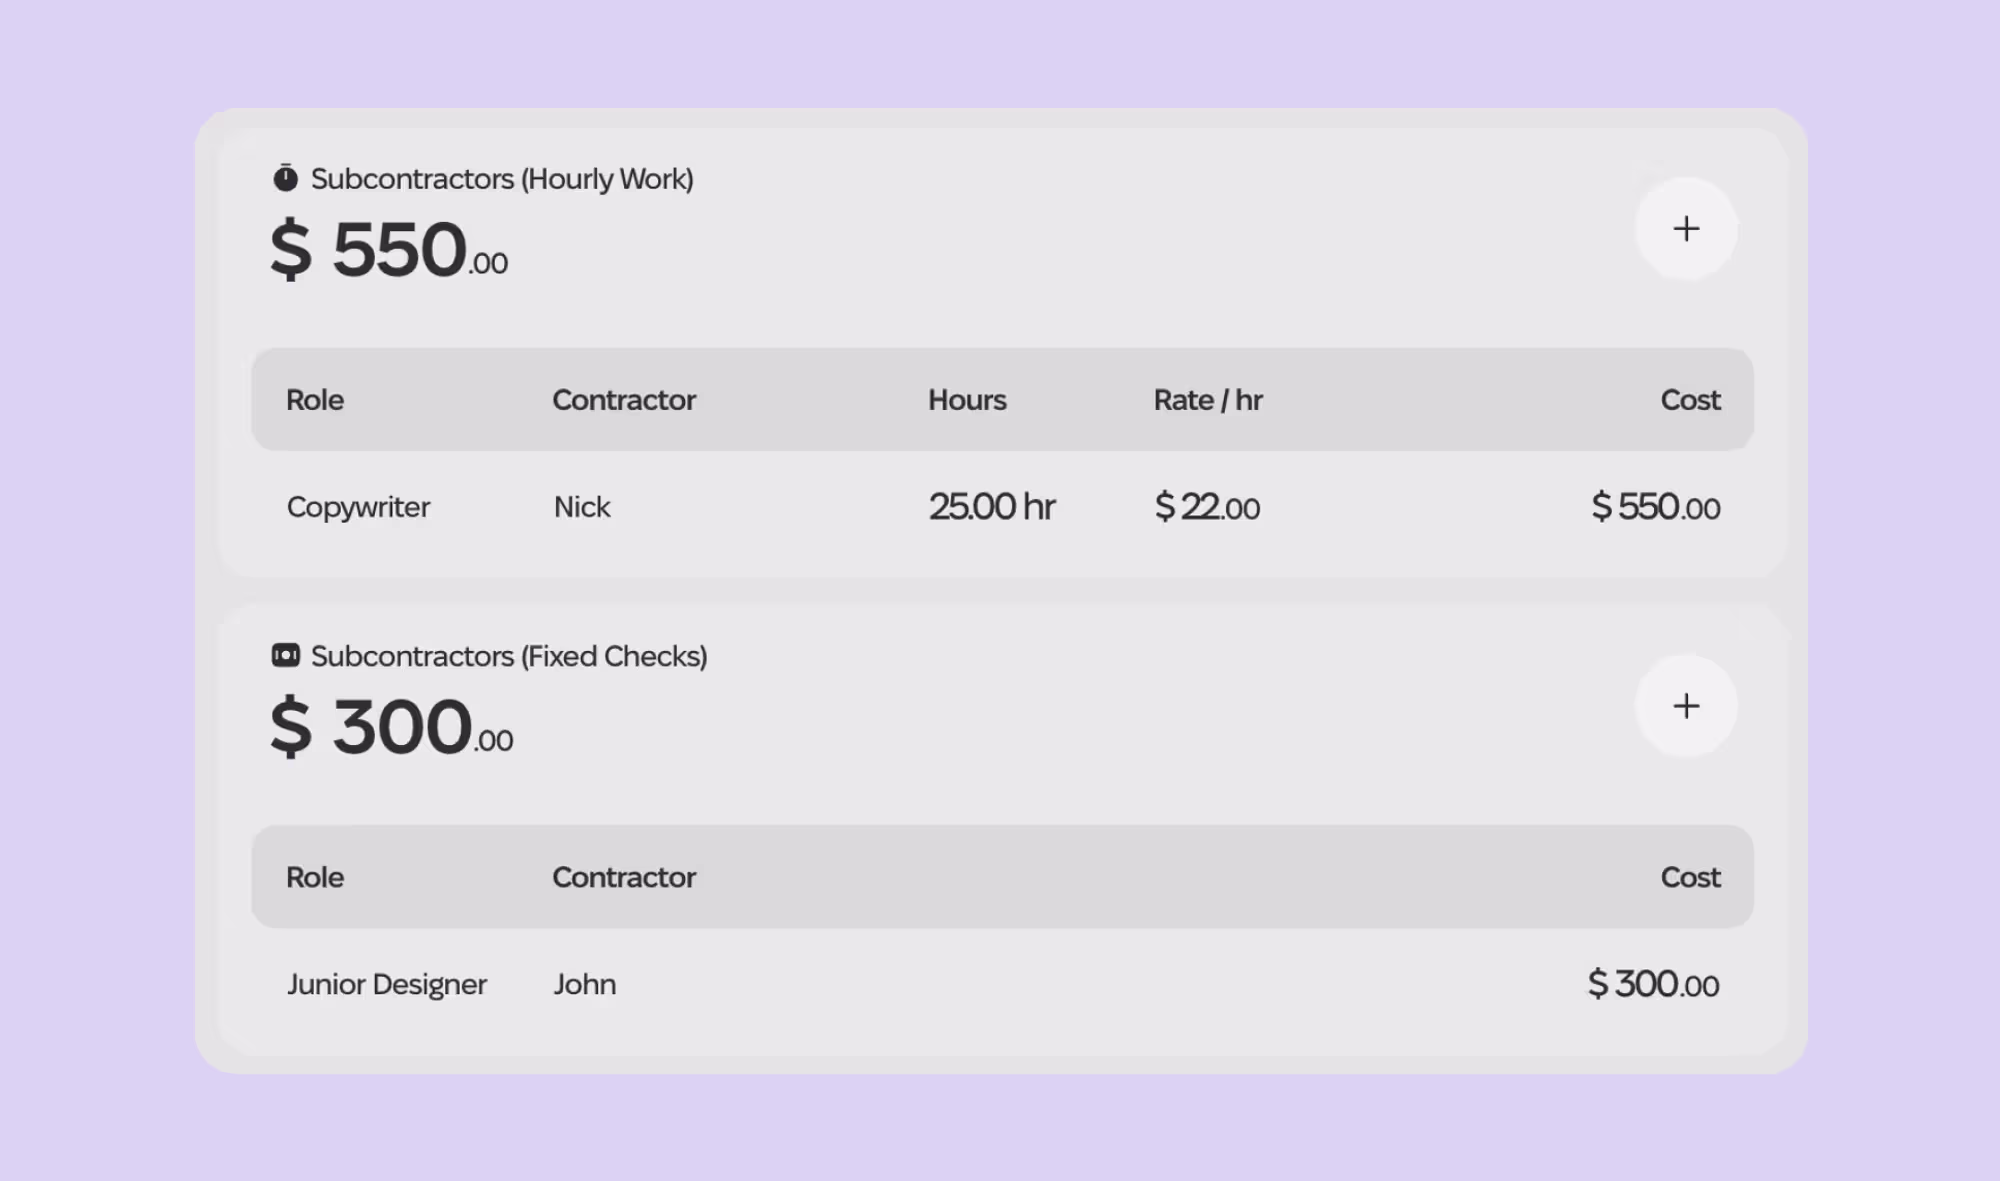
There are two types of contractors — hourly and fixed-fee.
You set the rate for hourly contractors yourself; we do not calculate it as we do for team members.
If the project estimate is based on commercial rates, you need to specify the commercial rate for each contractor that you resell to the client.
Add Project Expenses
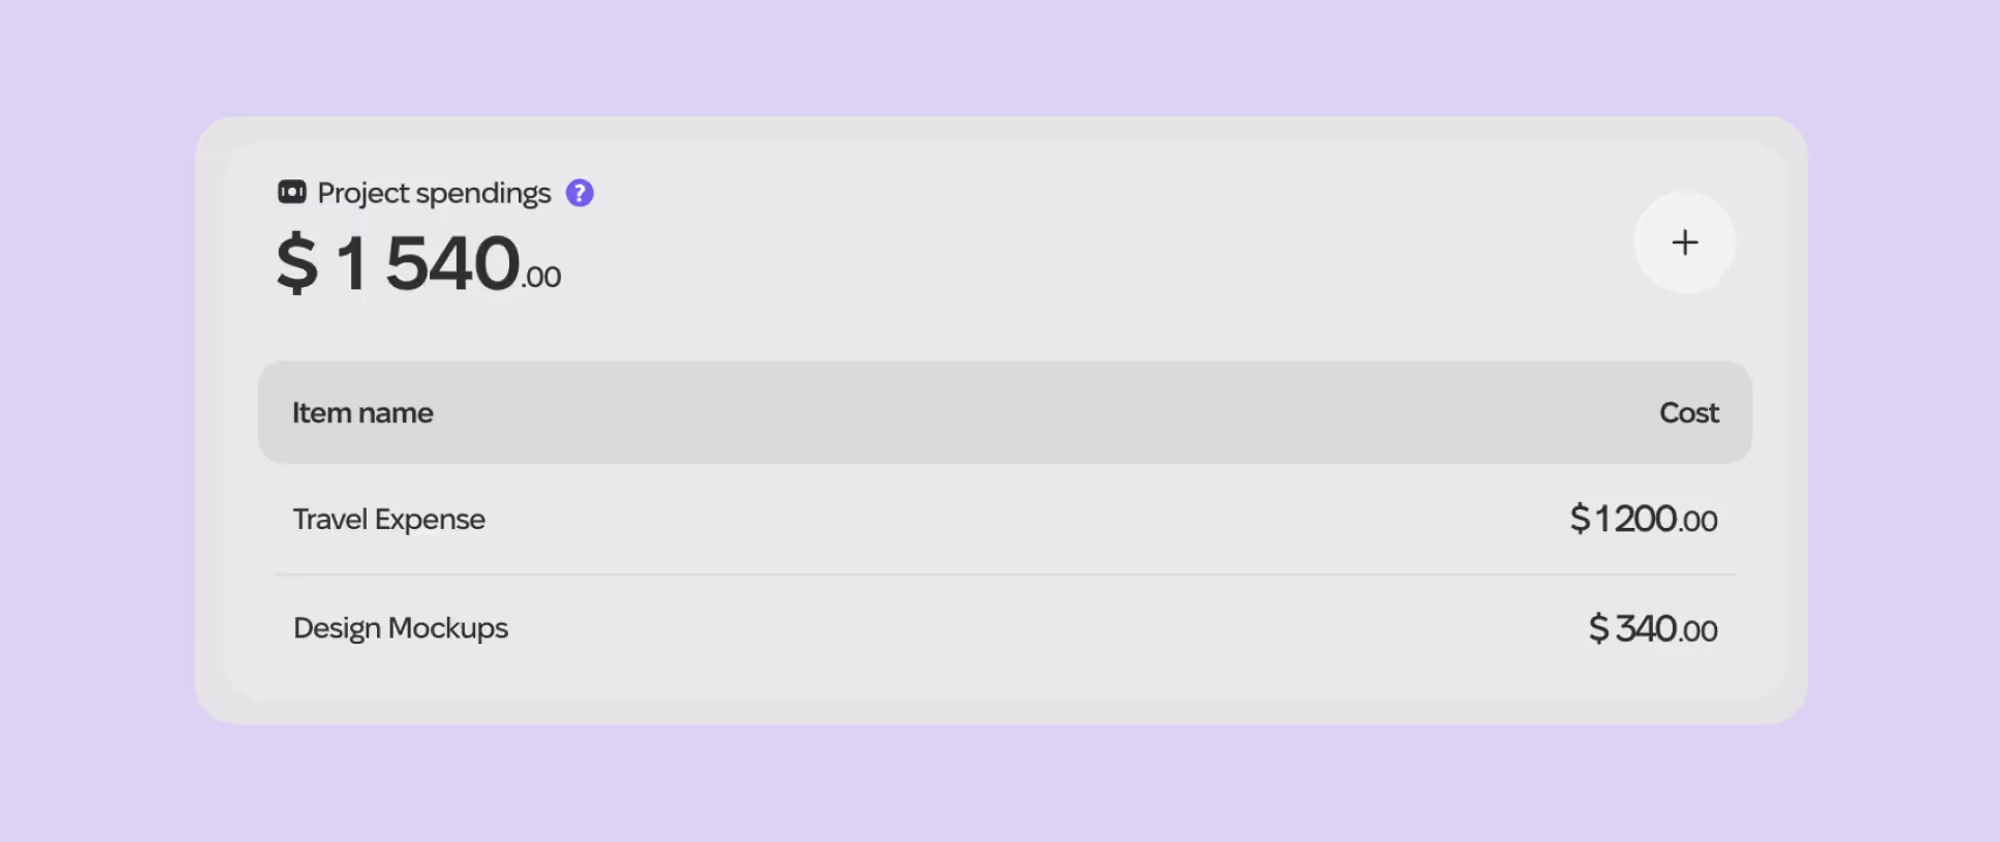
These are all expenses that need to be considered in the project price: trips to the client, purchase of mockups and templates, advertising costs, etc.
Automatically Calculate the Production Cost
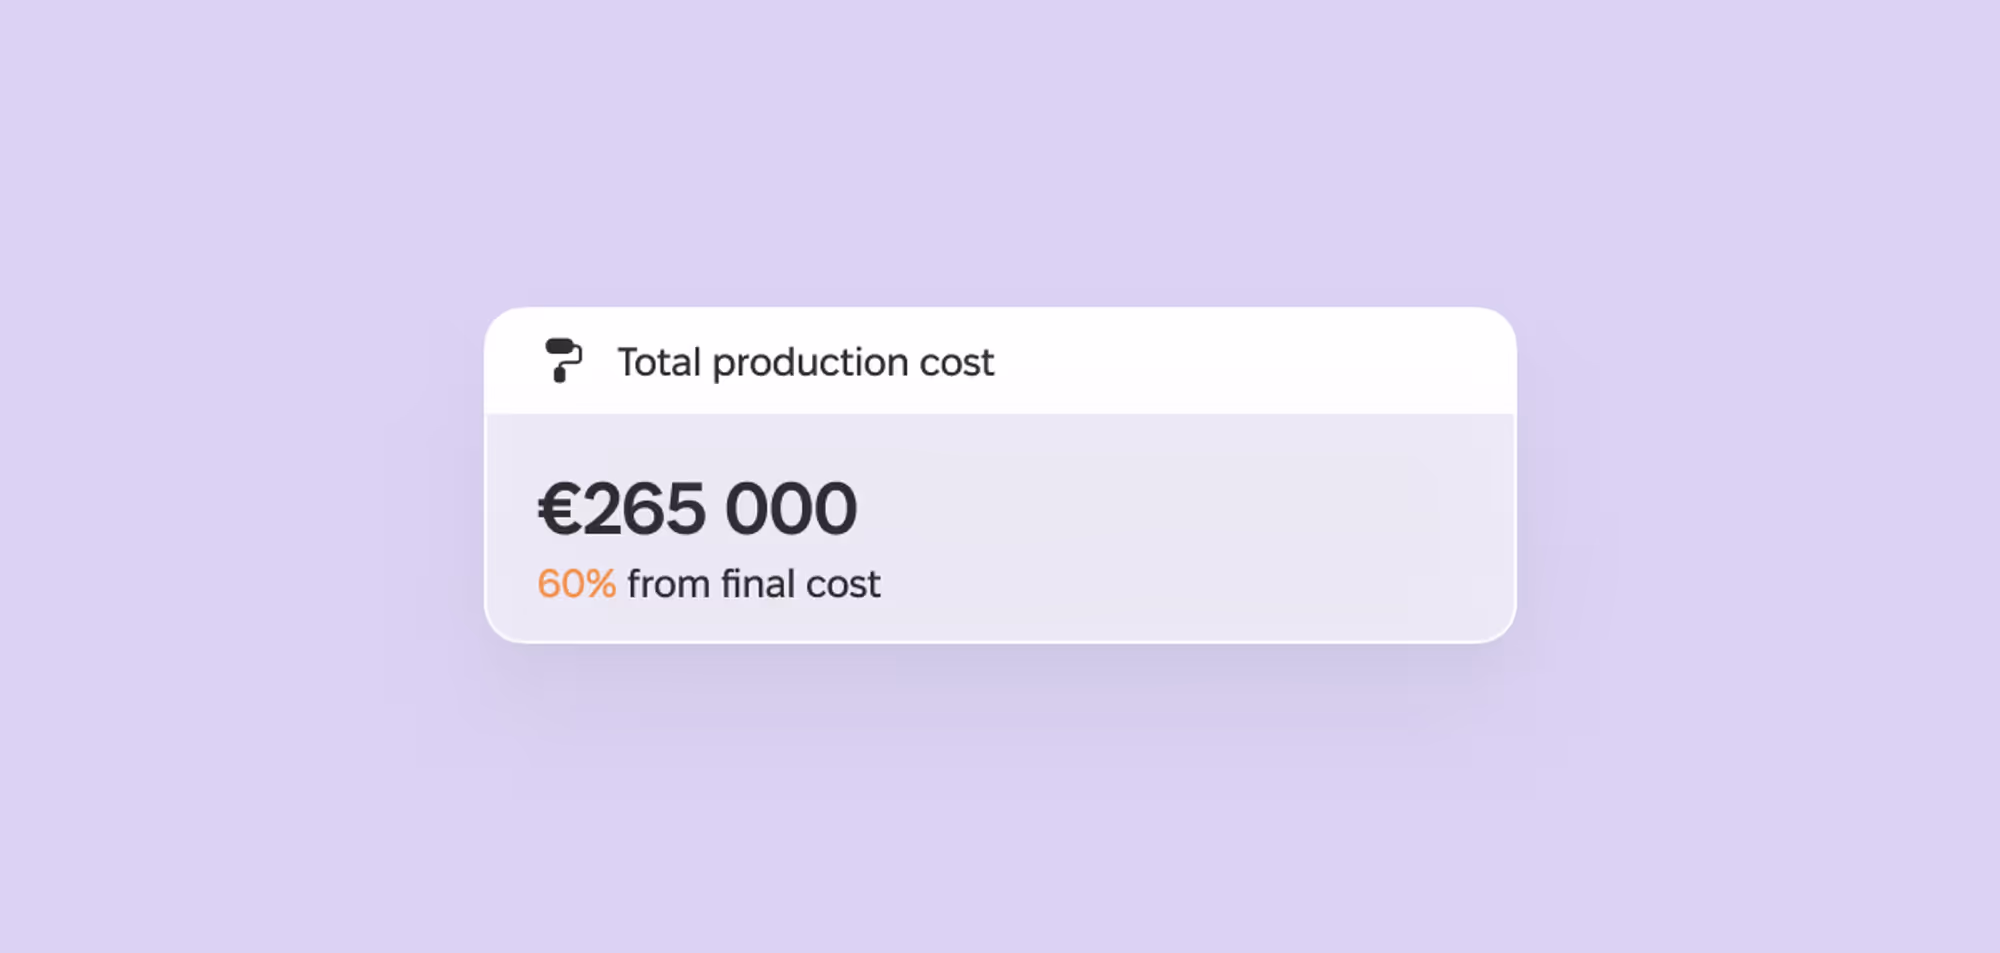
In the upper right corner of the screen, Fintellect calculates the production cost of the project, which includes the team, contractors, and project expenses. Now, to the production cost, you need to add your profit, taxes, and fees to calculate the final project price.
Specify Margin/Profit
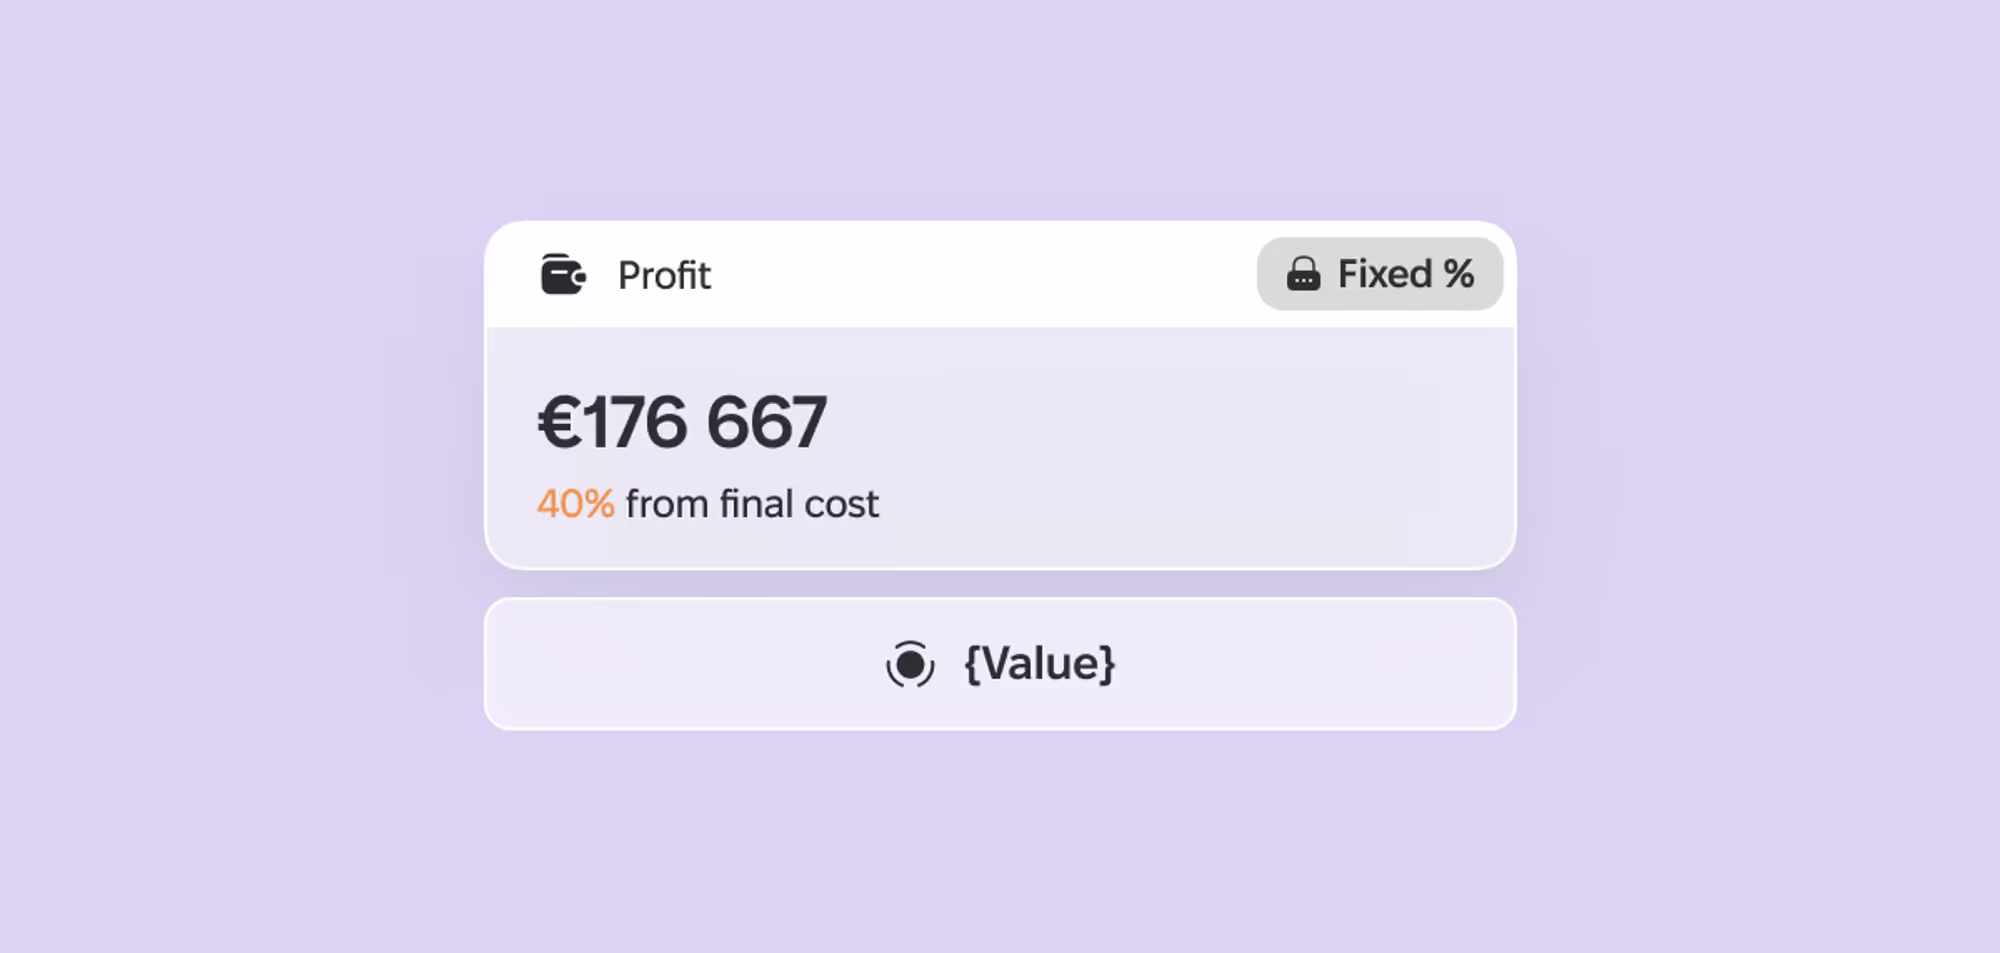
For One Price projects, you can choose the desired project margin or a specific amount of profit you want to achieve. For projects with a commercial rate, it is calculated automatically as the difference between the production cost, taxes, fees, and the final price.
Add Taxes and Fees
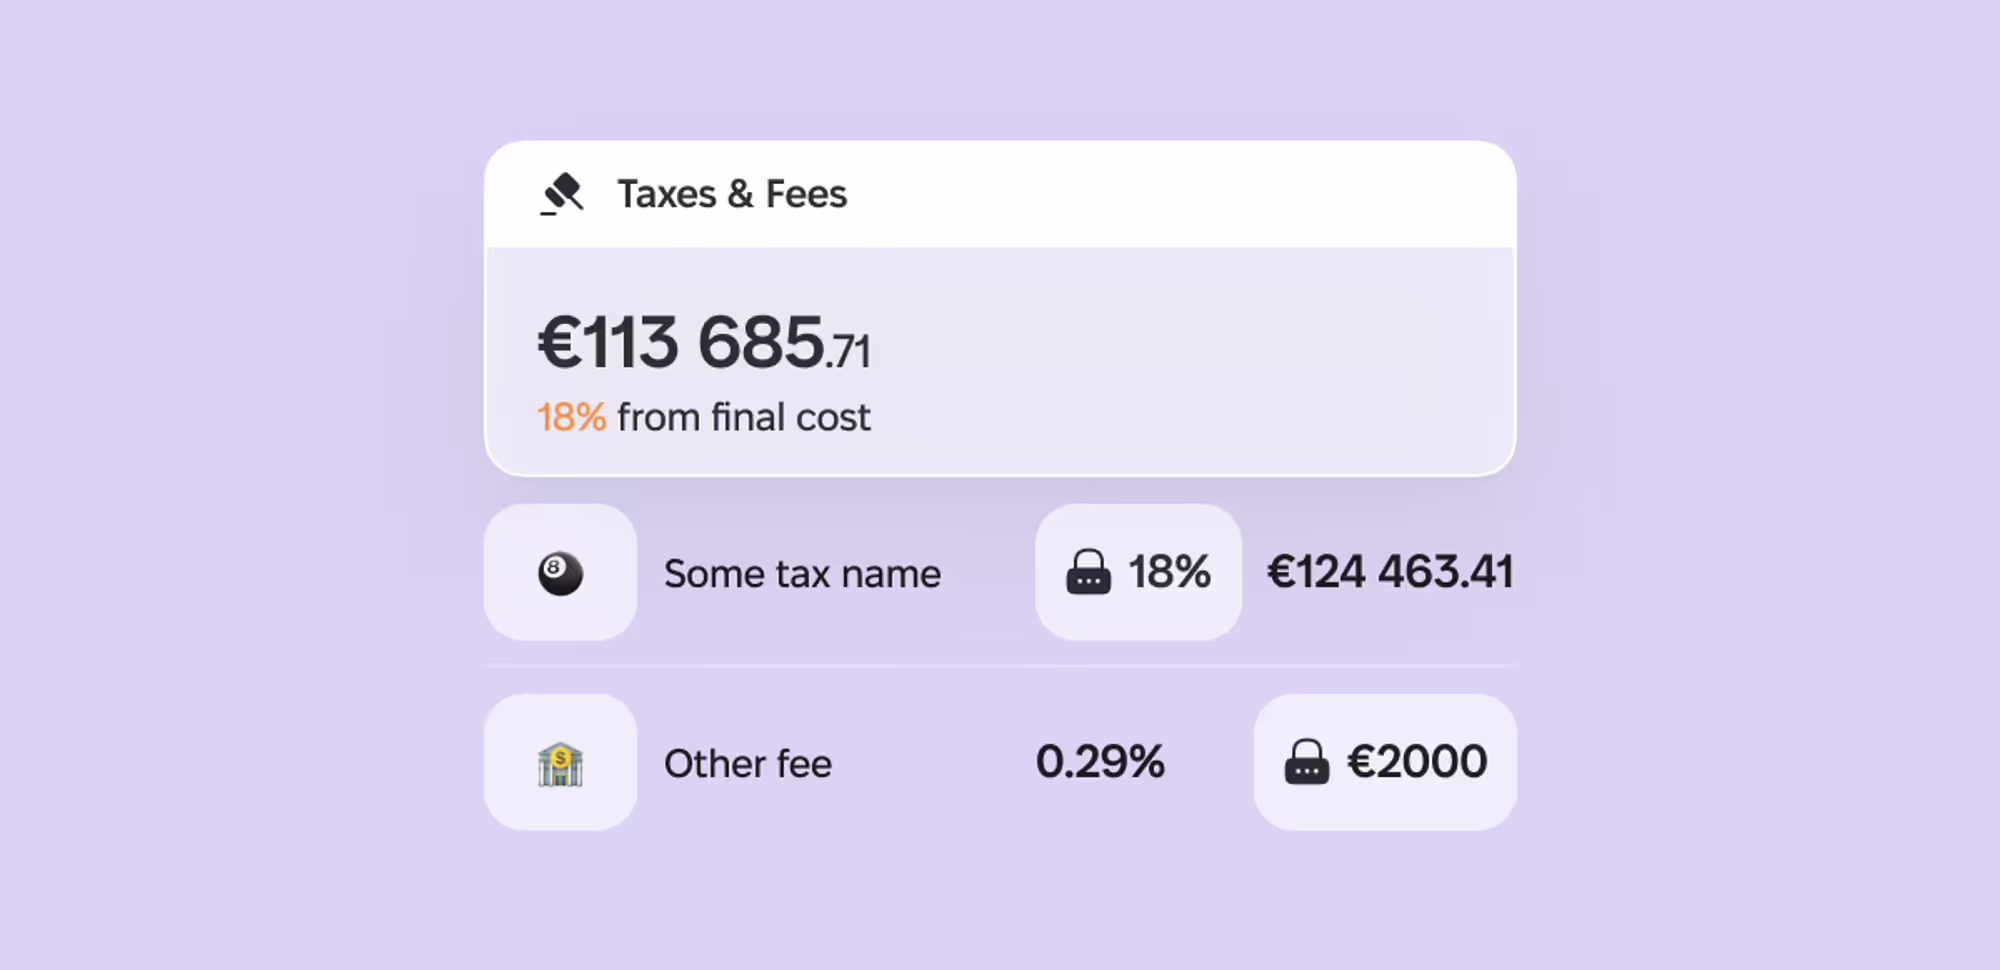
Tax and fee categories correspond to expense categories in the Plan.
You can add team bonuses and sales managers' percentages here.
You can add them as a percentage or as a specific amount.
All taxes and fees are calculated from the final project price.
Automatically Calculate or Specify the Final Price
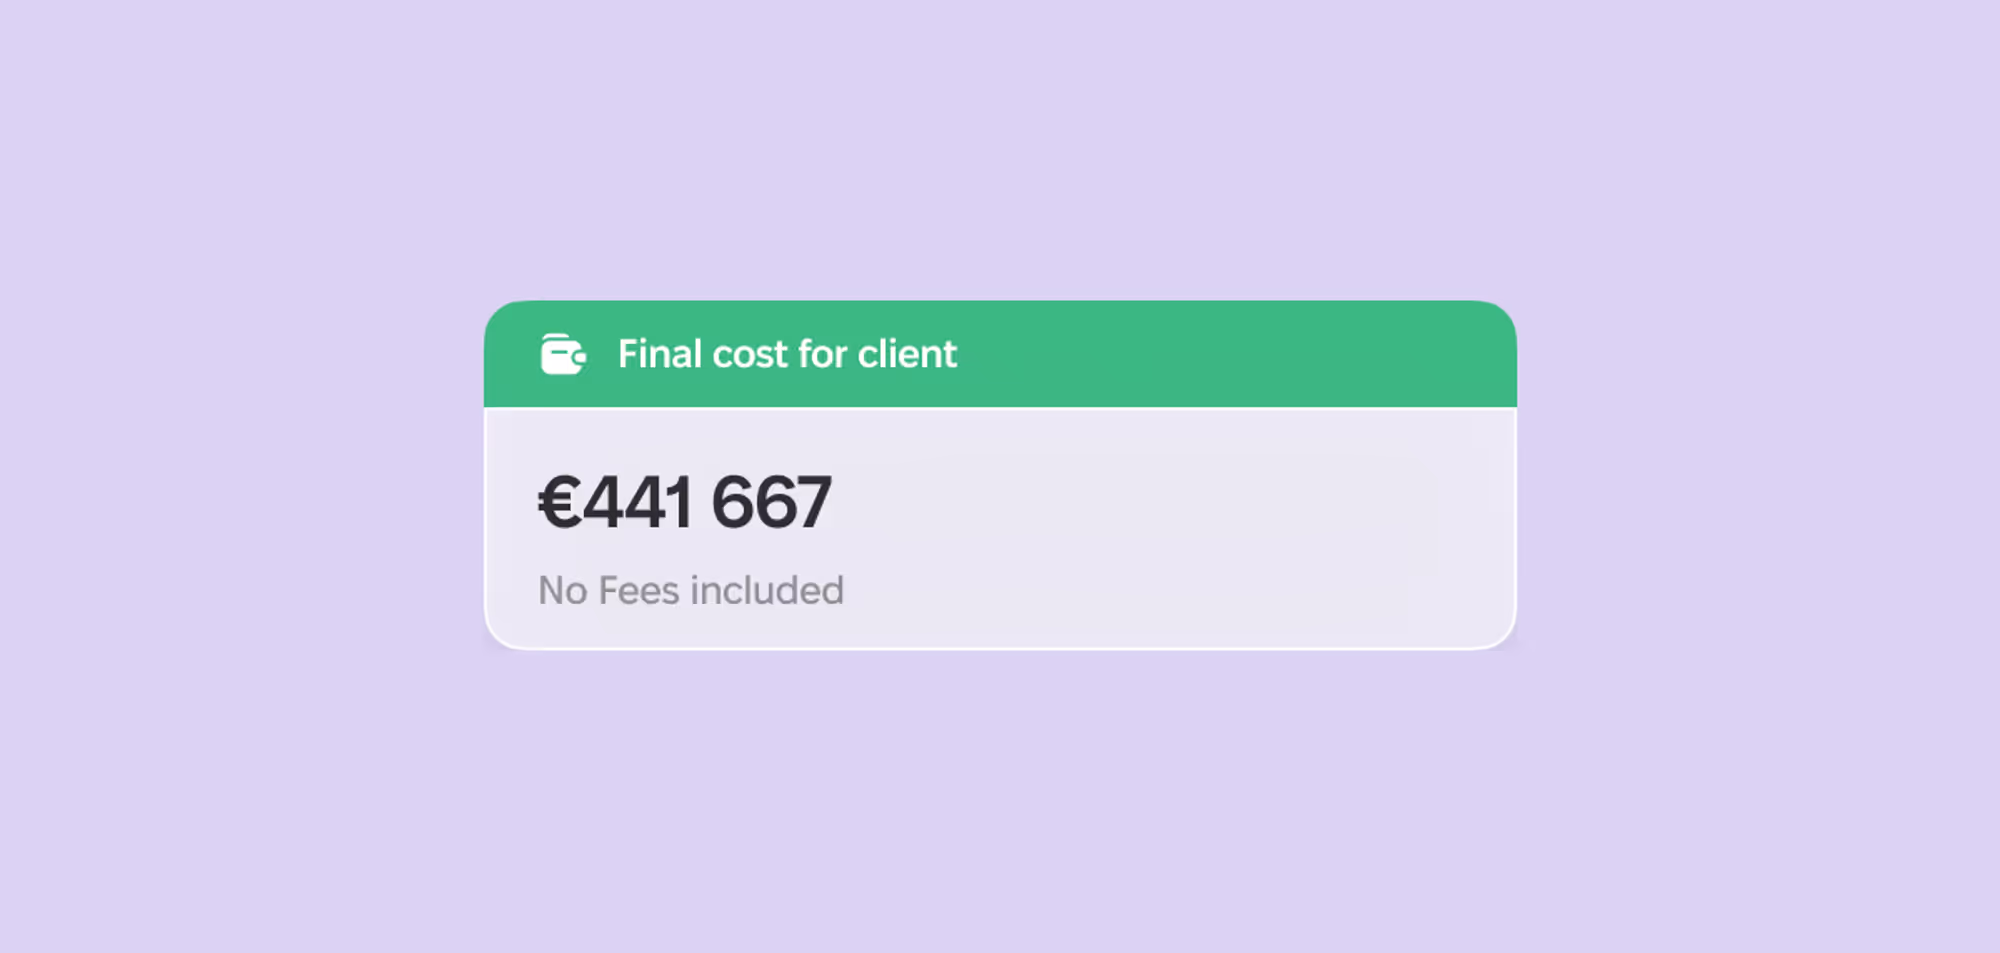
The project price is calculated automatically. However, for One Price projects, you have the option to manually specify the final project price.
3.5. Launch the Project
When the estimate is completed and agreed upon, click Start to launch the project.
After launching the project, the estimate cannot be changed — it will be recorded, and this action cannot be undone. Therefore, do not start the project until its estimate and price are fully agreed upon.
Step 4: Manage Actual Project Income and Expenses
4.1. Connect Your Time Tracker
You can connect Worksection, Toggl, or Clockify to import time logs into projects and track actual team work expenses in the project.
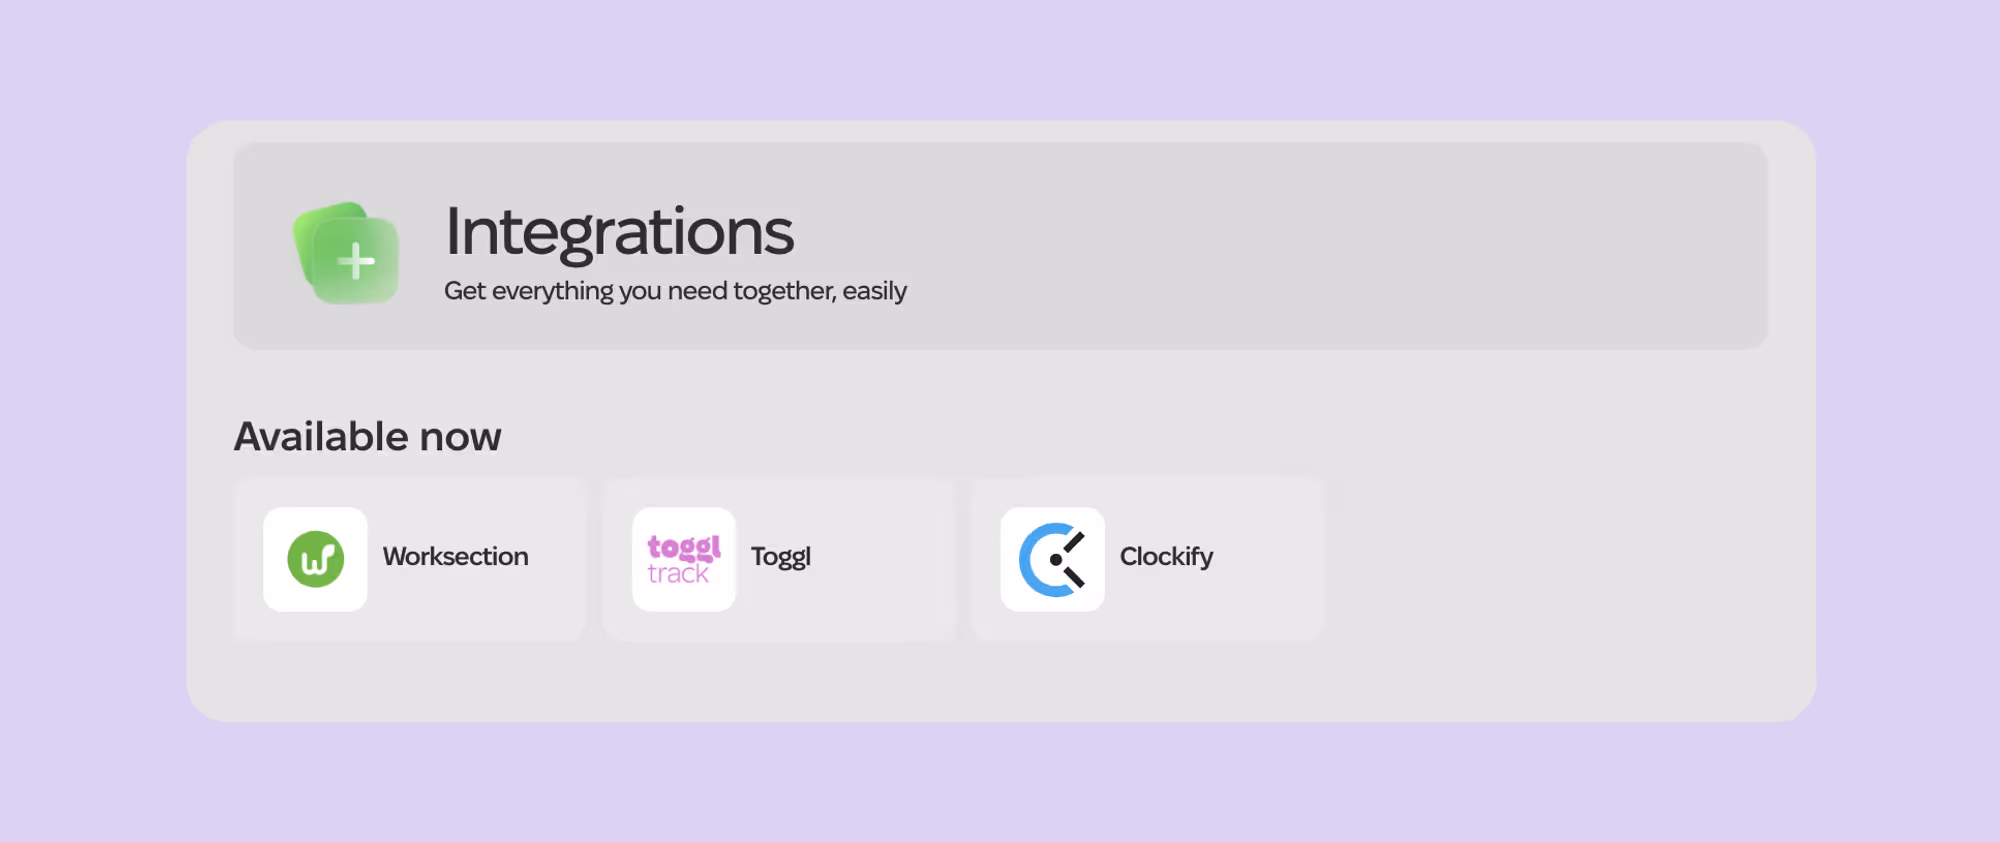
Go to Settings > Integrations. Select the tracker you use. Connection instructions are available on the specific tracker pages.
Import the Team
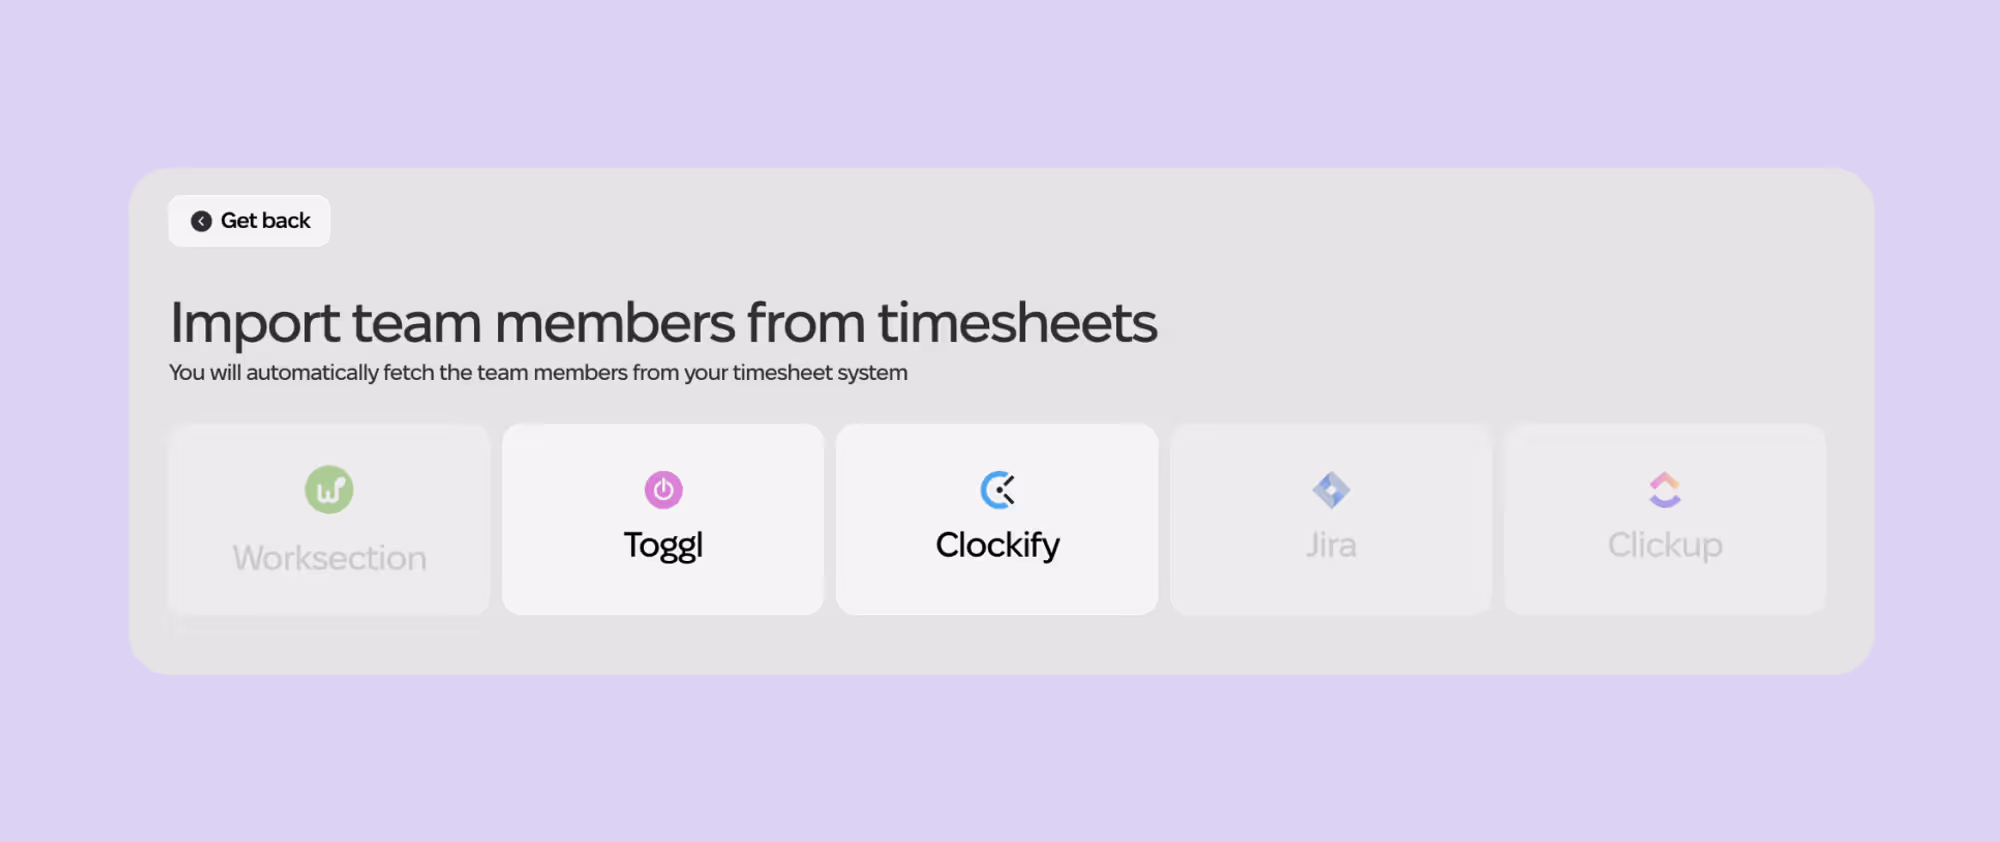
Go to the Team section. If you have already added team members, you can link their accounts in the time tracker by clicking Link.
If you have not added team members, click the “Import” button (green arrow down), select the tracker, and import the people.
Import Projects
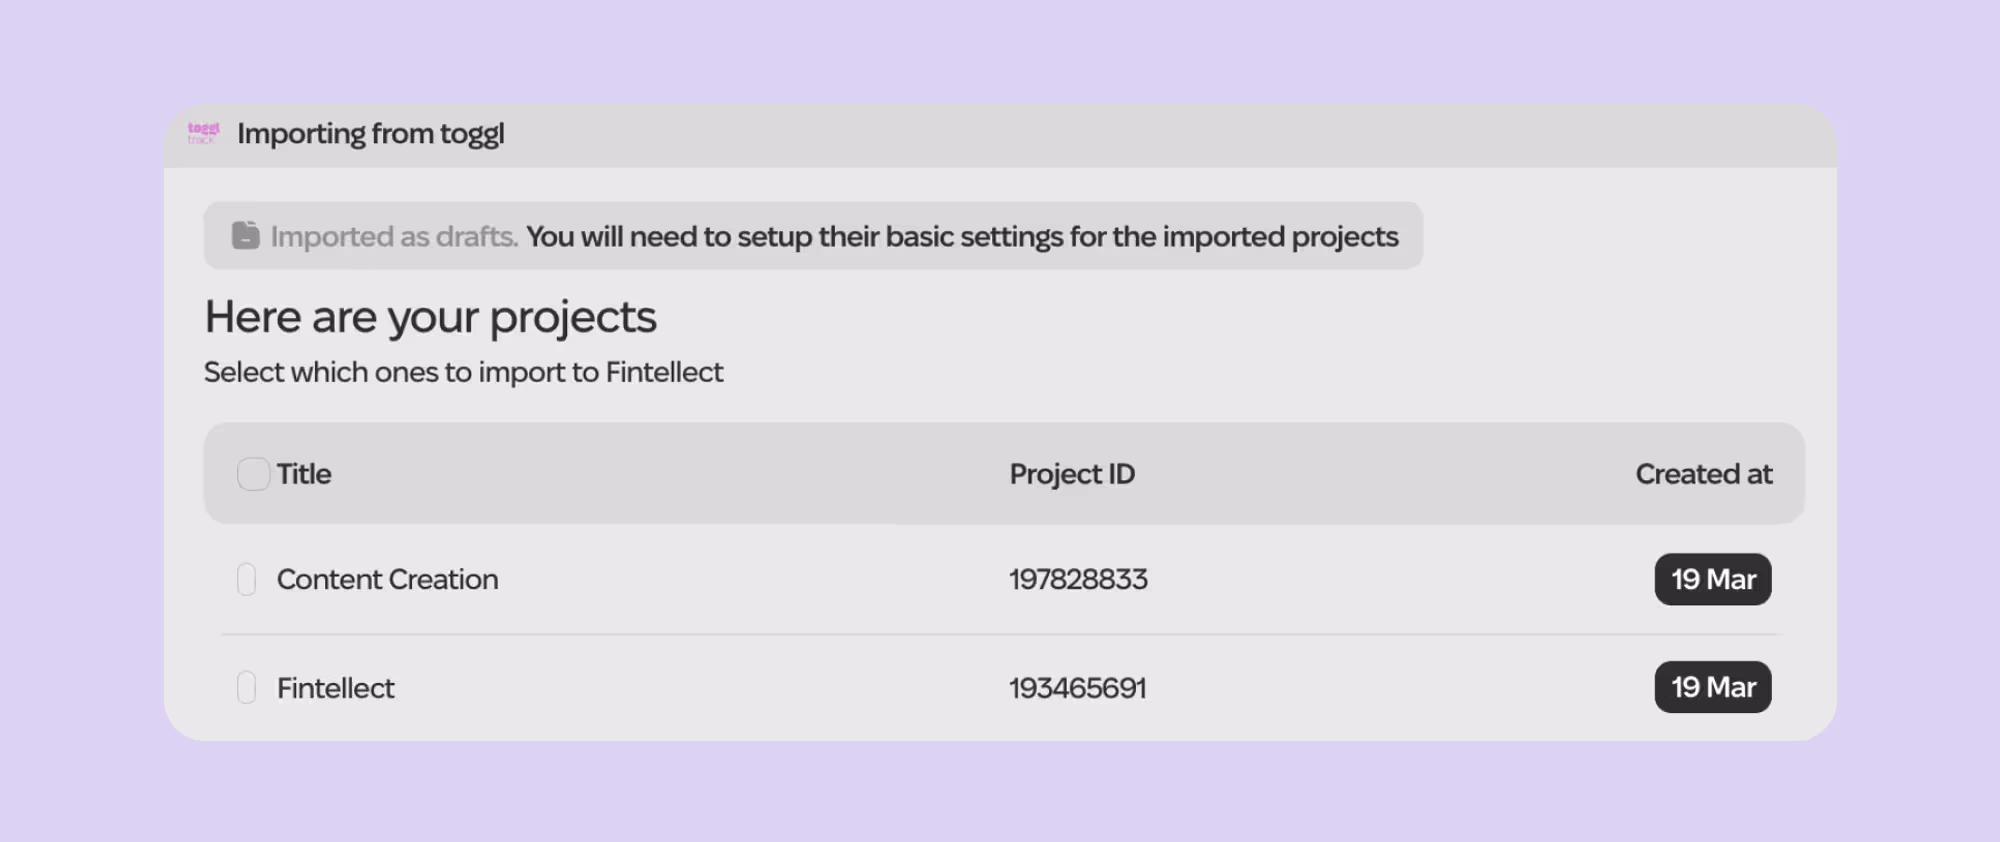
Do the same with projects: go to the Projects section and import projects from your connected tracker, or link these projects to existing ones.
To import projects, click “Import” (green arrow down).
To link a project to an existing one, go to the project settings and select Link timetracking app.
4.2. Start Working with the Production Section
In the Production section, you can:
See the actual expenses of the project
Compare actual expenses with the estimate
Add or import team time logs to see how the cost of work increases
Add expenses that were not planned at the Estimate stage
See the growth of the internal rate
Understand where there are overspends in the project
How to Open Project Production?

If Production is locked, it means you haven't estimated and activated the project.
To activate Production, you must:
Complete the Estimate section. To work with the actual project expenses, you need to first conduct an estimate: fill in team costs, contractor costs, and project expenses, add taxes and fees, set the final price, or calculate it automatically.
Start the project. To do this, click Start in the upper right corner of the project.

When you start the project, the Estimate section will be recorded, and you will not be able to change it, so only start the project when your estimate is finalized.
Synchronize Project Expenses and Income with the Plan
When you start a project or sprint, all income and expenses for this project are synchronized with the Plan section and added to the corresponding categories:
Contractors
Project expenses
Taxes
Bank fees
Sales and Marketing
Accounting and Legal expenses
Project income
You need to plan these expenses and income by the correct dates.
Go to the Plan and open the corresponding category.
Find the expenses there — each will display the project name.
In the calendar, select the planned payment date.
If payments have already been made, change the payment status by clicking the yellow toggle.
Do the same with income.
4.3. Calculate the Cost of Team Work in the Project
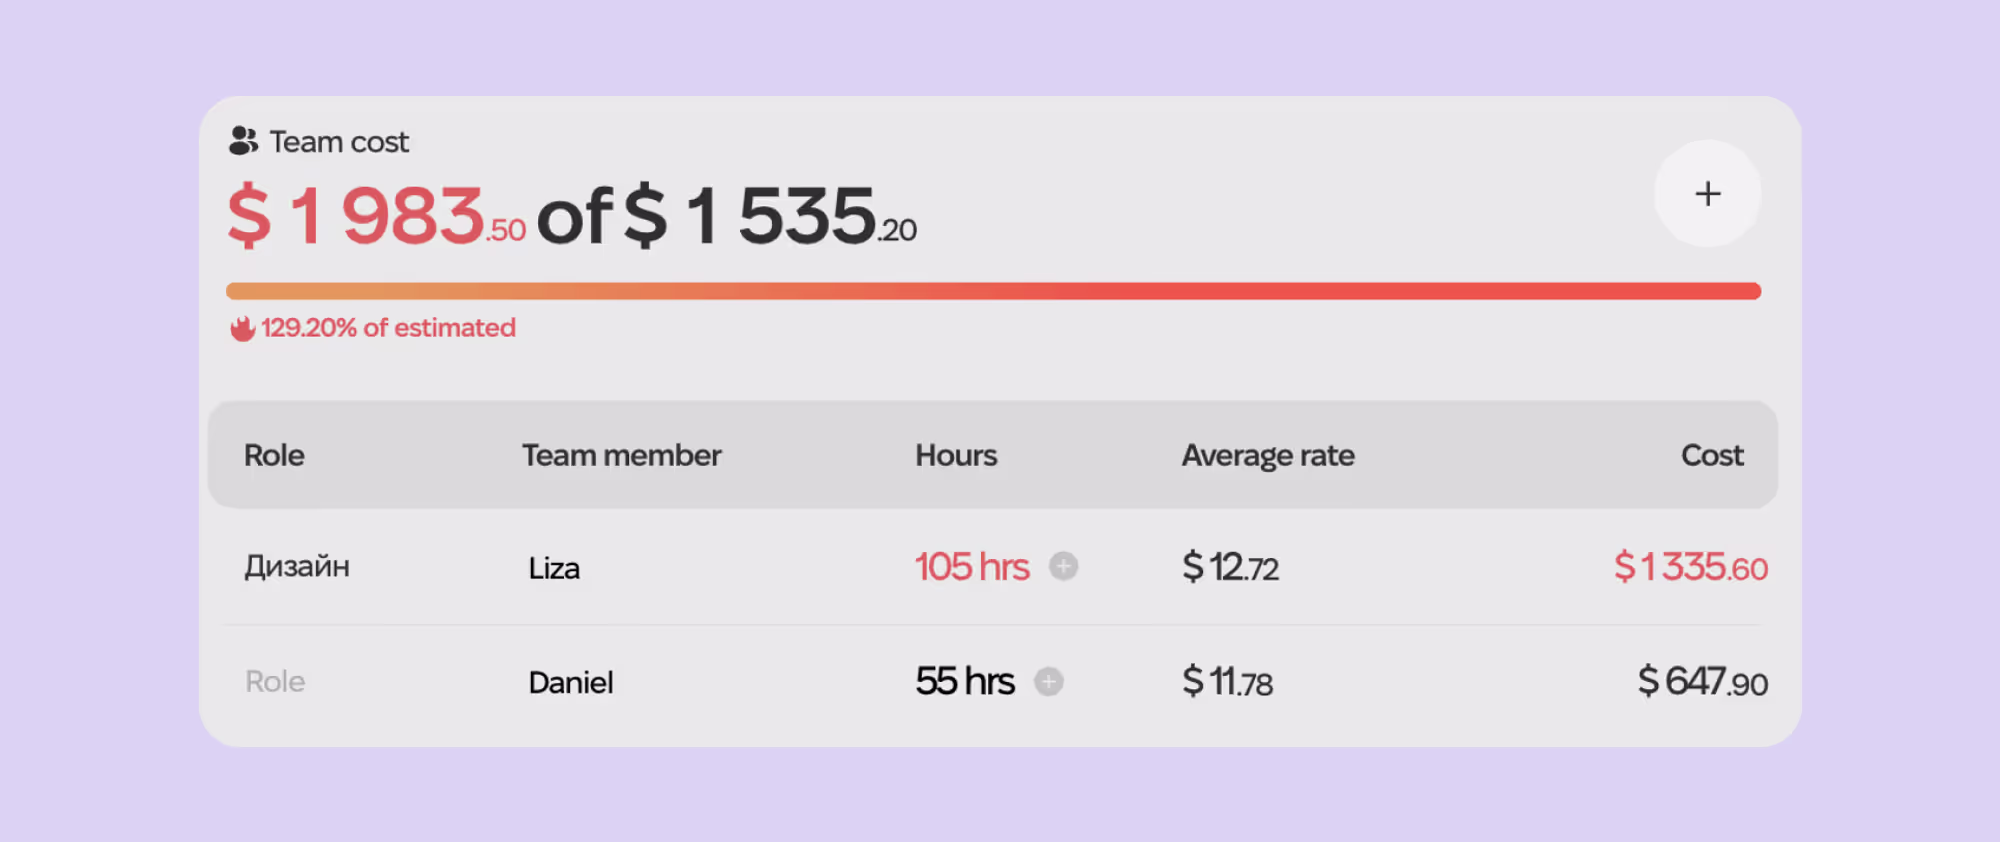
The cost of team members' work depends on the hours they actually worked on the project.
Work hours are added at the internal rate, which is automatically loaded from the Team section.
This rate includes the executor's salary and a share of the overhead calculated in the Team.
If the growth of expenses affects the rate, it will be reflected in the project's production column as the Average rate.
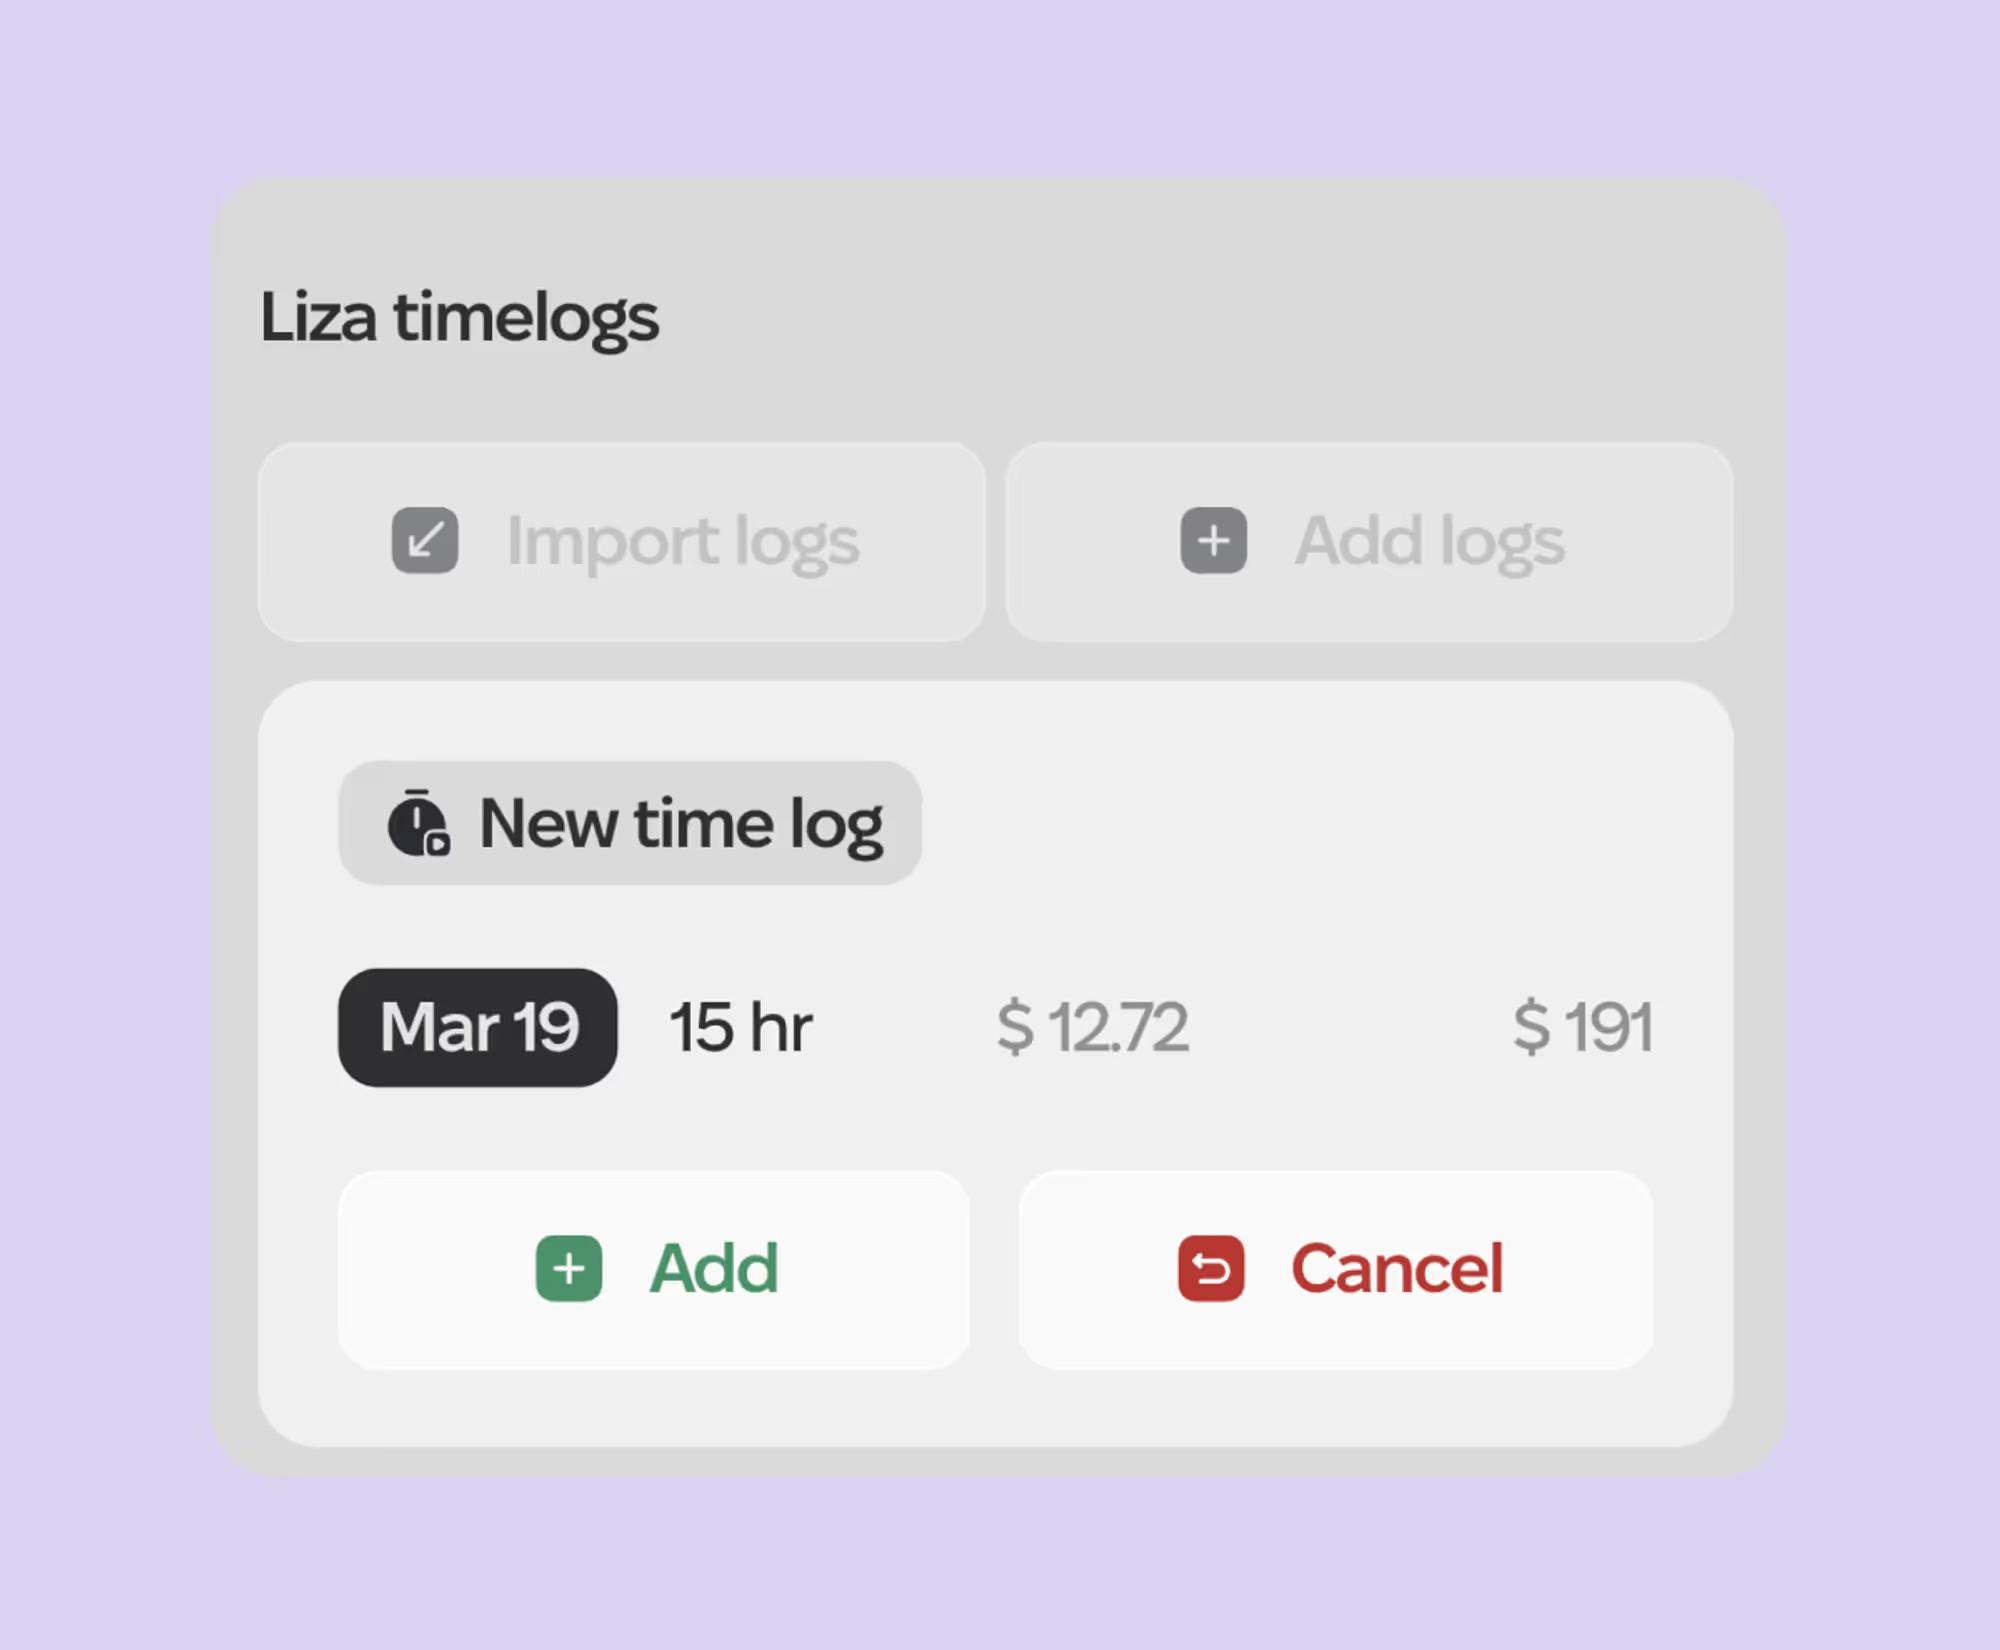
How to Add Time Logs for Team Members
Click the “+” next to the hours for specific team members.
In the right-hand menu, import time logs if the tracker is connected, or enter them manually.
To enter manually, add the number of hours you want to log. The time log will show the rate and total cost of the logged hours.
4.4. Calculate the Cost of Contractors and Project Expenses
Add Contractor Time Logs

Contractor time logs are added the same way as team members: click the “+” next to the hours and add new time logs.
The cost of the time logs will be the same as you included in the project estimate.
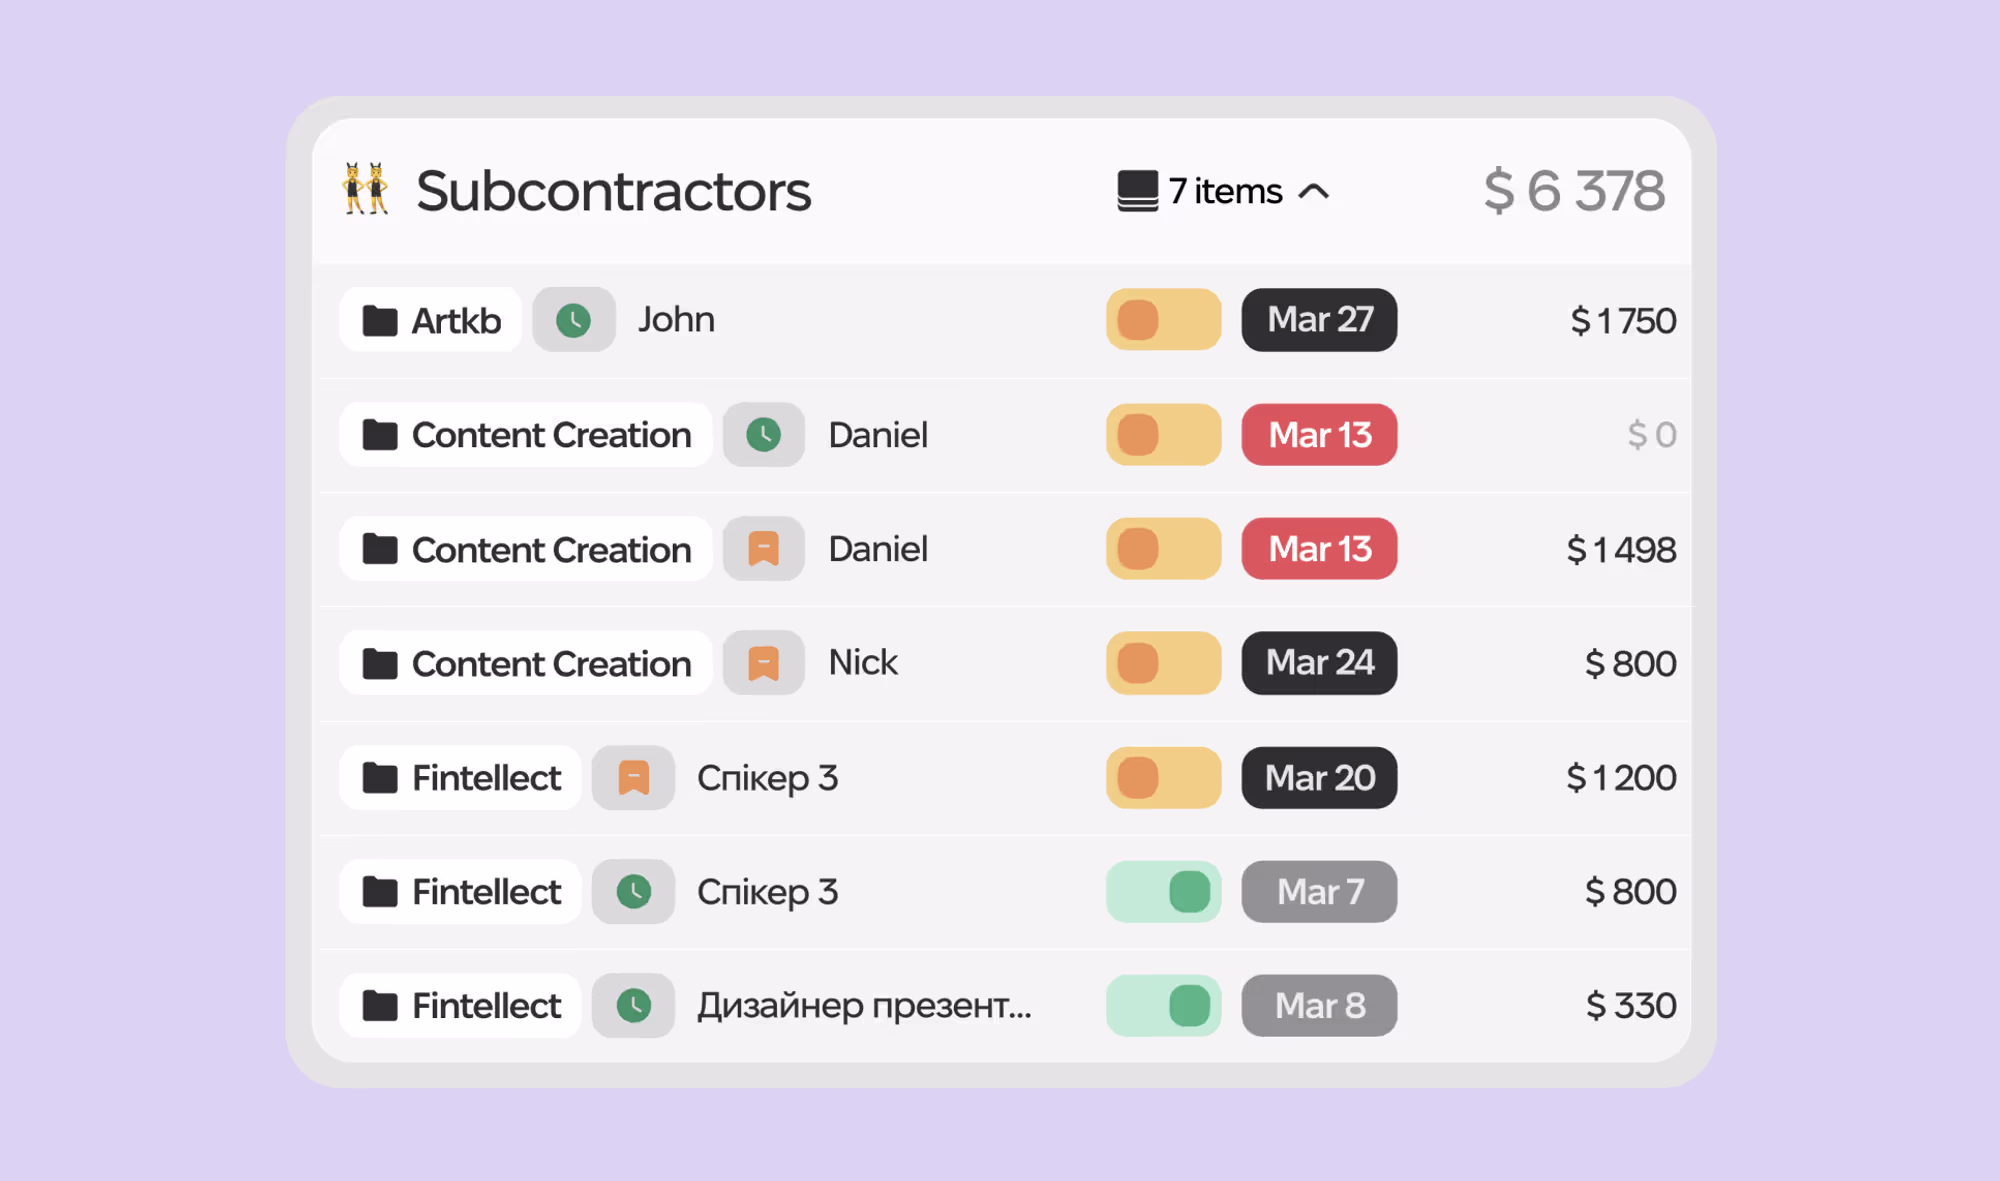
Manage the Cost of Actual Work and Balance
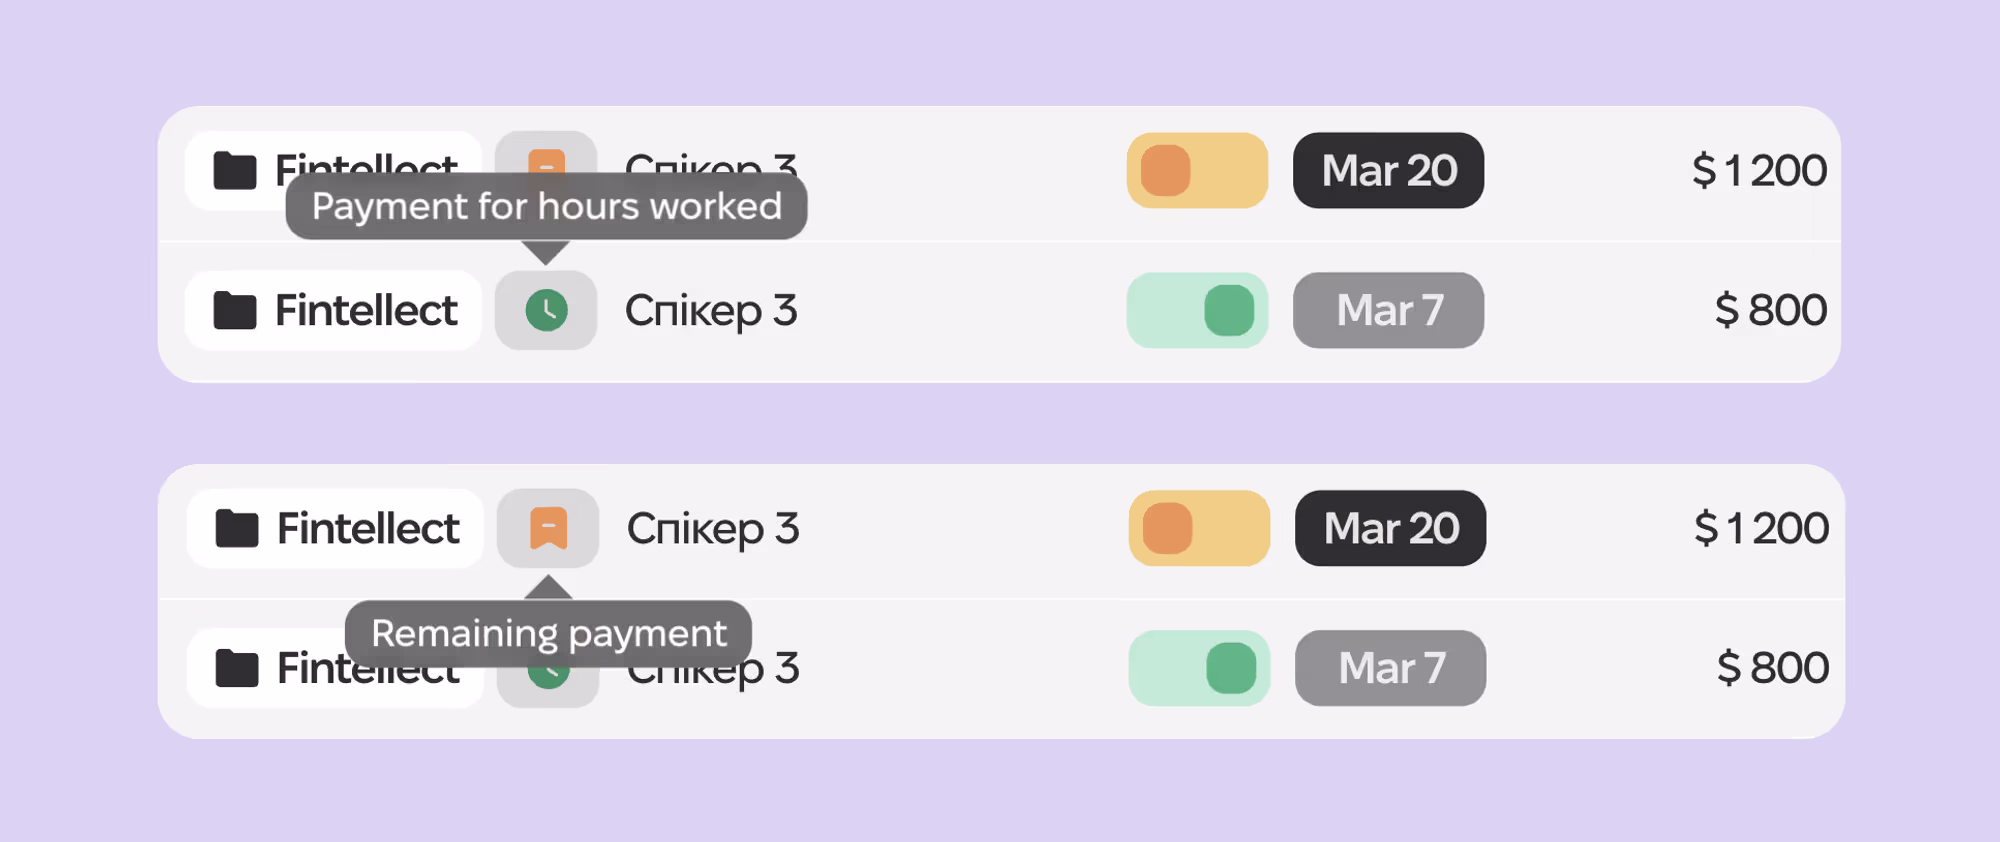
In the Plan, expenses for hourly contractors will be divided when adding time logs to the project.
Added time logs will be marked as Payment for hours worked, indicating the cost for the already worked hours.
The remaining hours and cost will be marked as Remaining payment.
Manage Project Expenses
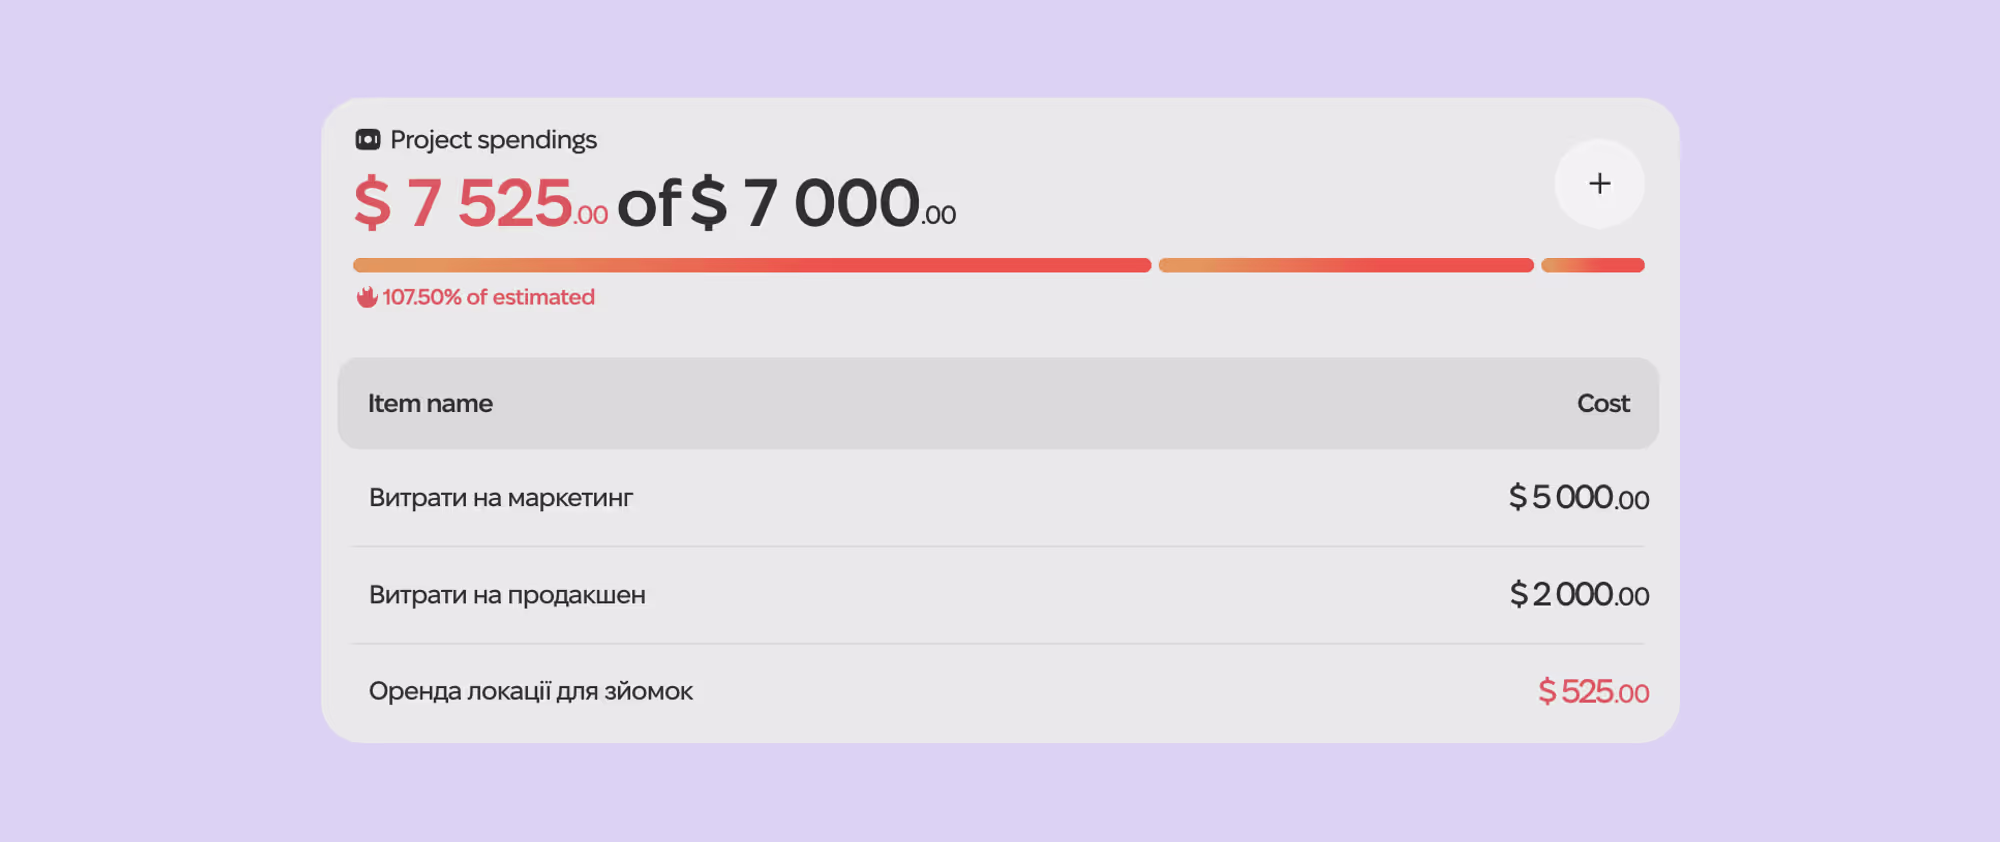
You can see the cost of project expenses in the Project spendings section.
Expense amounts are also displayed in the Plan.
To mark a project payment as paid, change the payment status in the Plan from Expected (yellow) to Paid (green).
The payment status in the project will automatically change.
4.5. Monitor Project Profitability
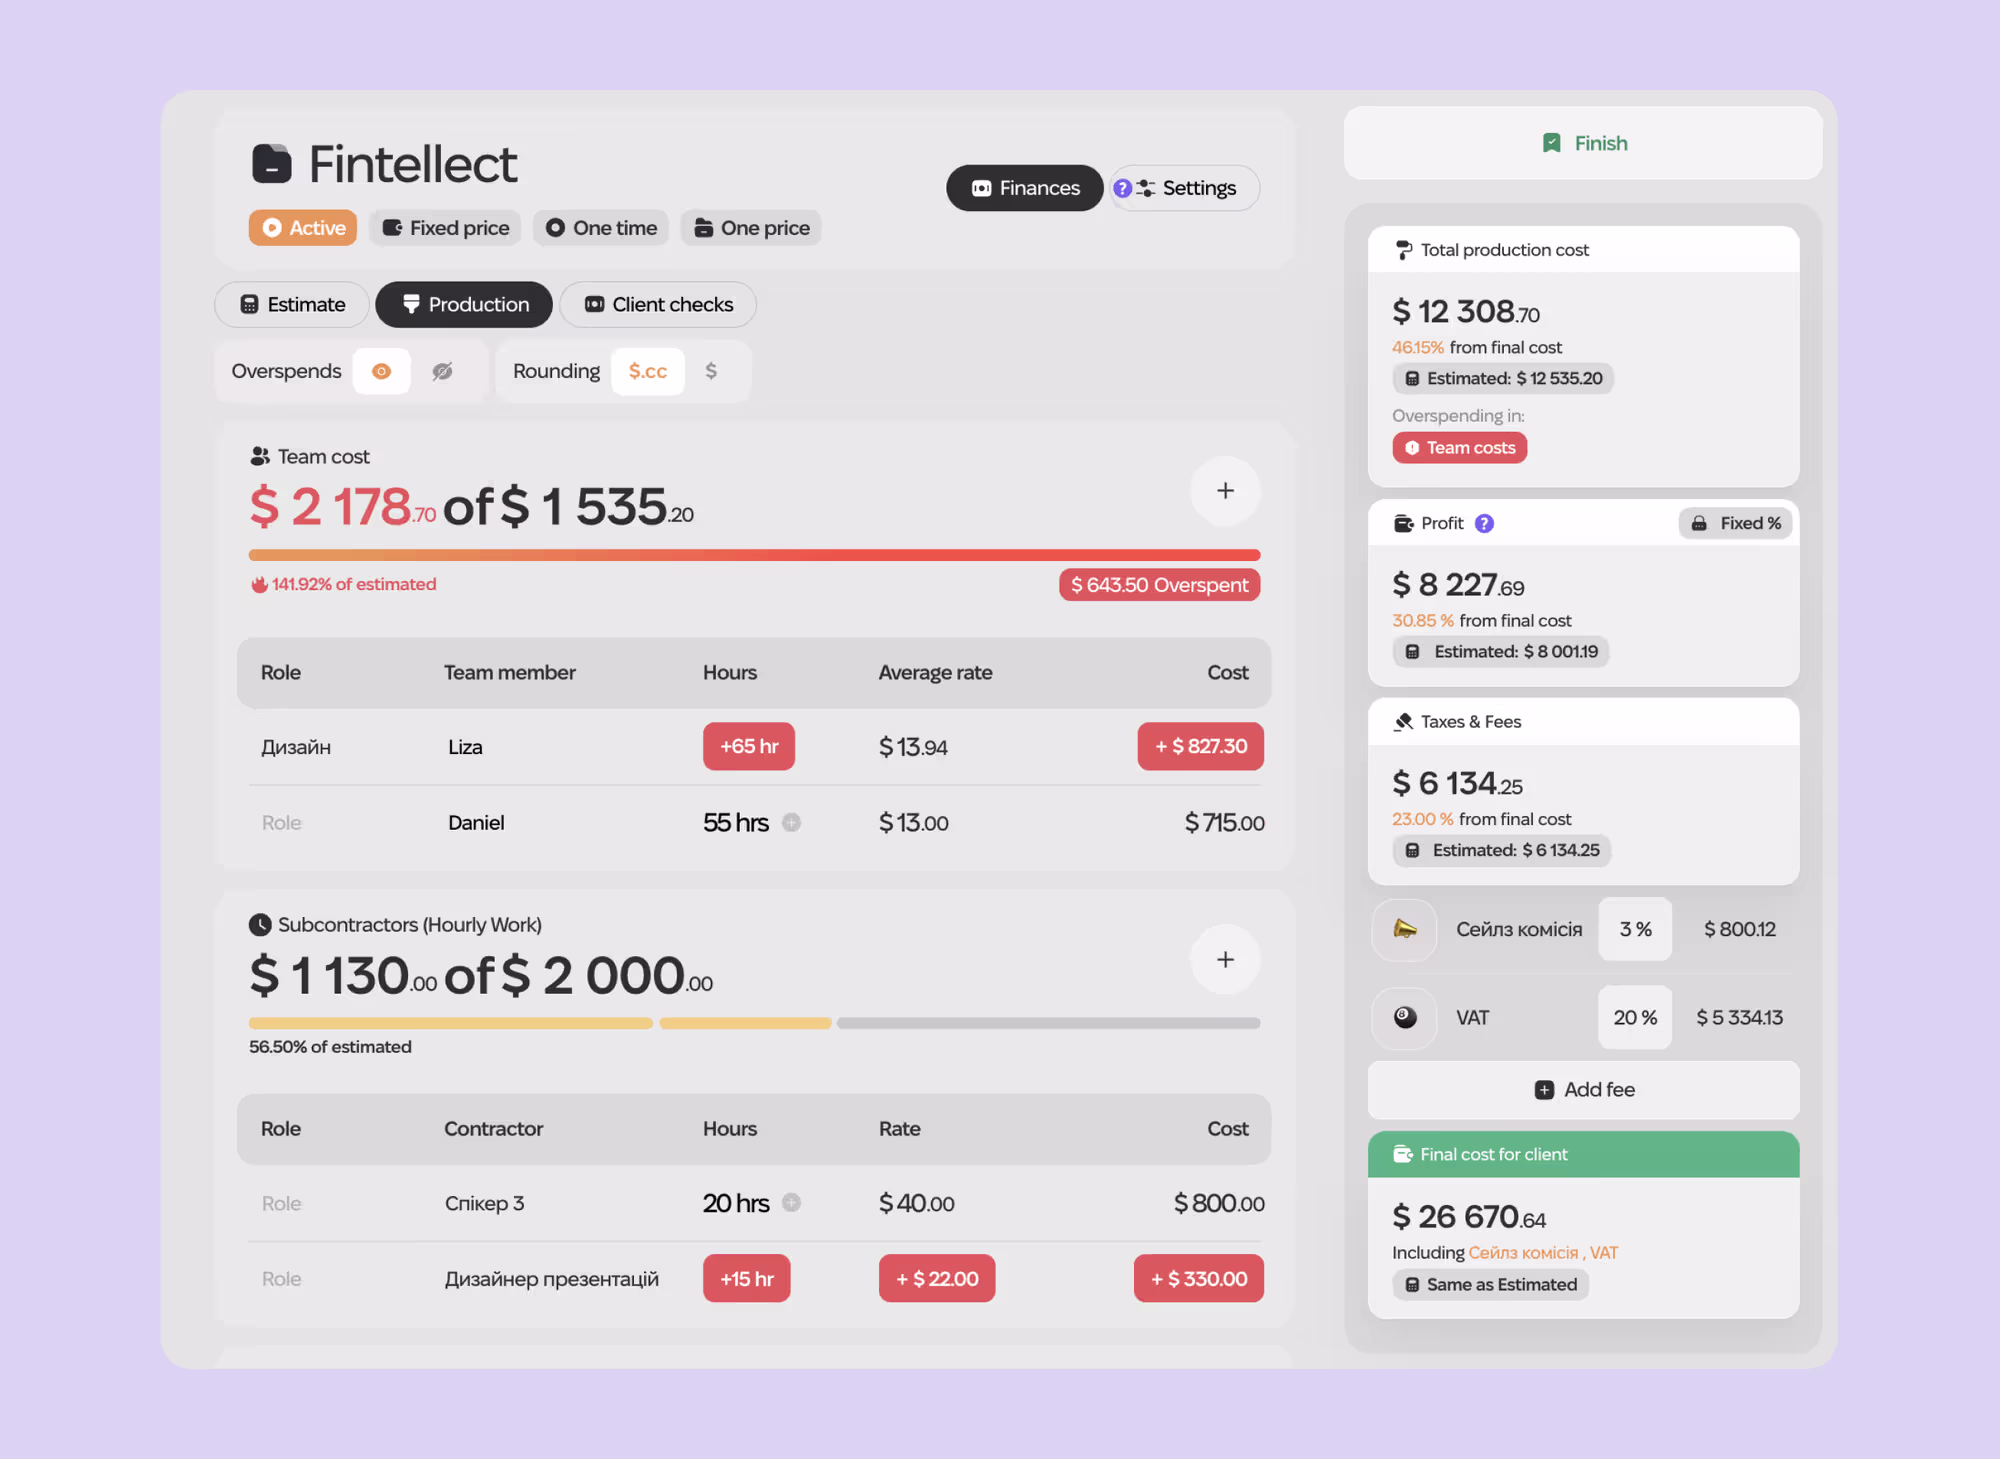
Enable Overspends to See Porject Losses
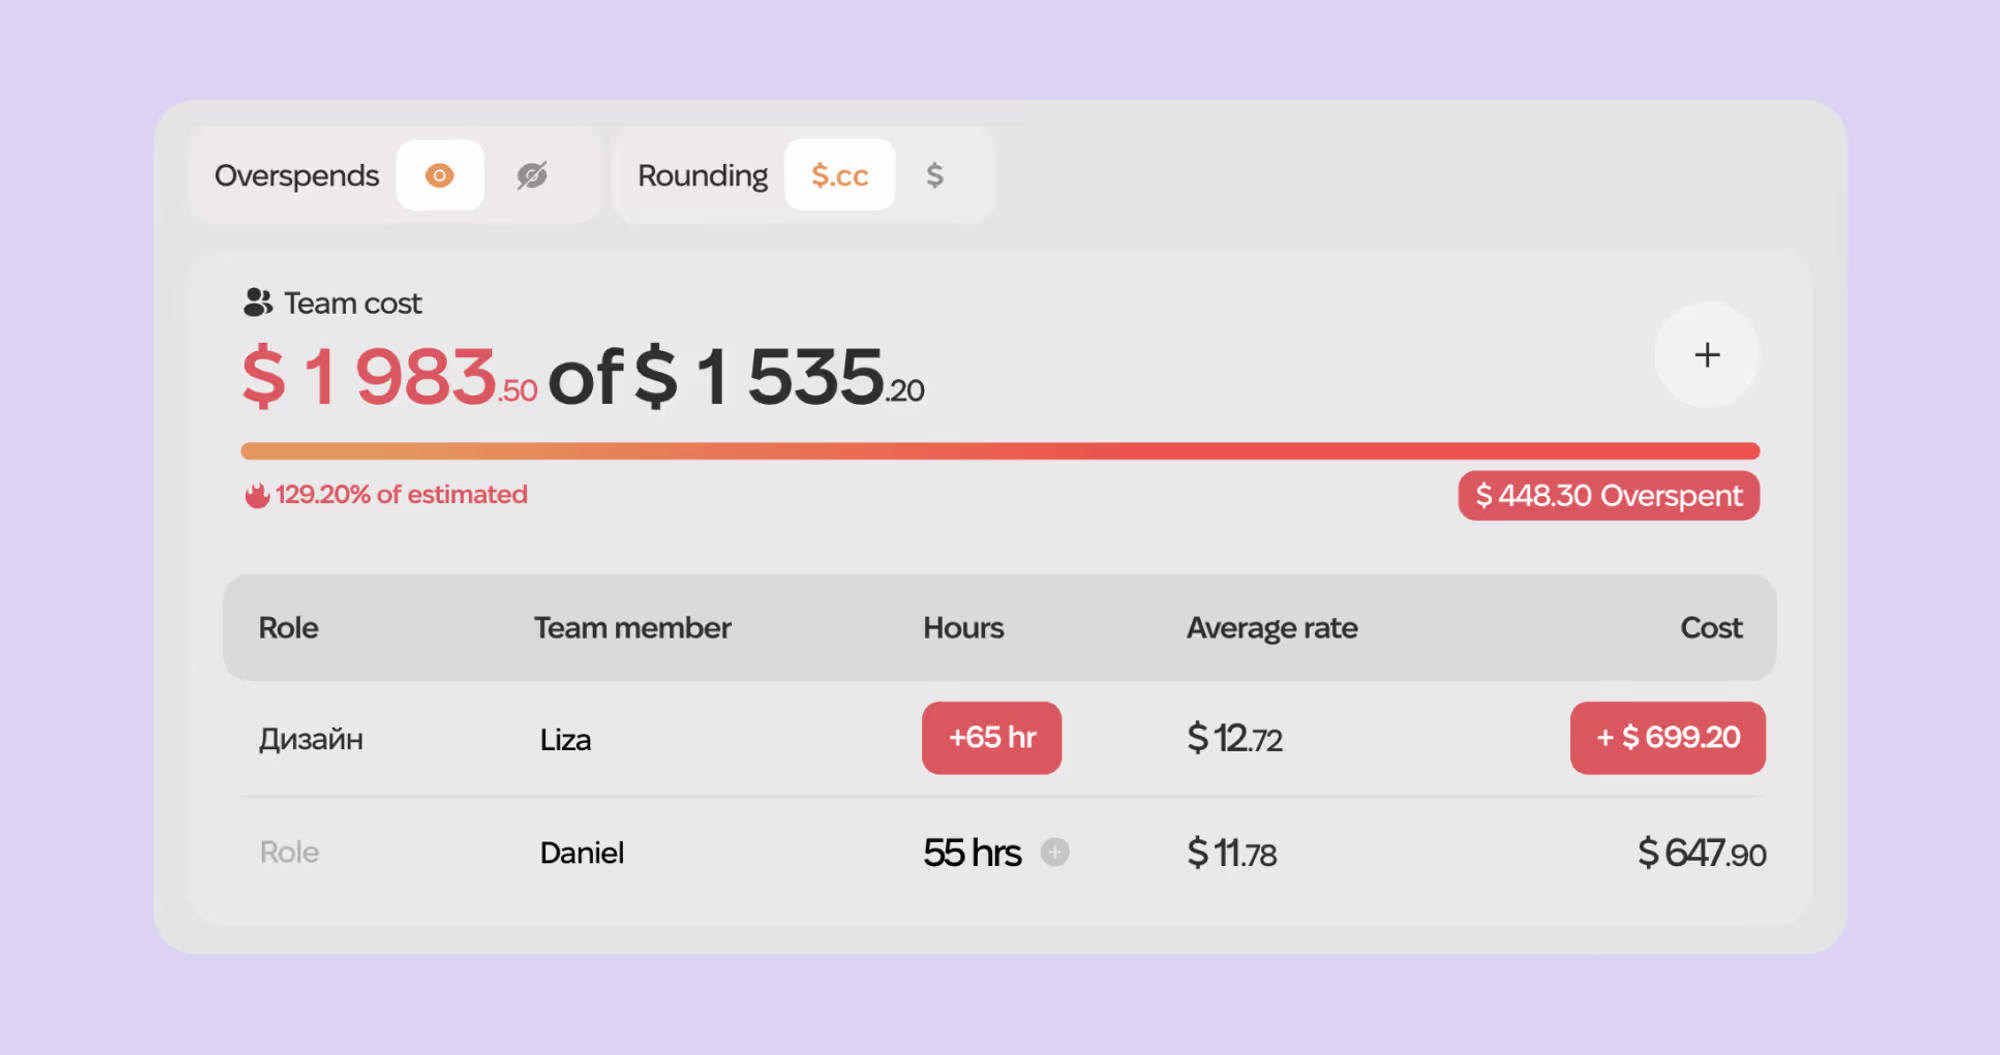
You can see overages in hours and money by enabling the Overspends filter — it is located above the Team section in Production (eye icon).
By enabling it, you will see how many more hours each team member spent compared to the planned, and how much this increased the cost of their work.

Overages will also be highlighted in the Total production cost widget:
It shows the actual cost of working on the project.
The share of production costs from the total cost.
The estimated cost of work in the Estimated block.
Tags indicating which part of the project has overages: team, contractors, project expenses.
4.6. Add Project Income
Create Payments in the Project
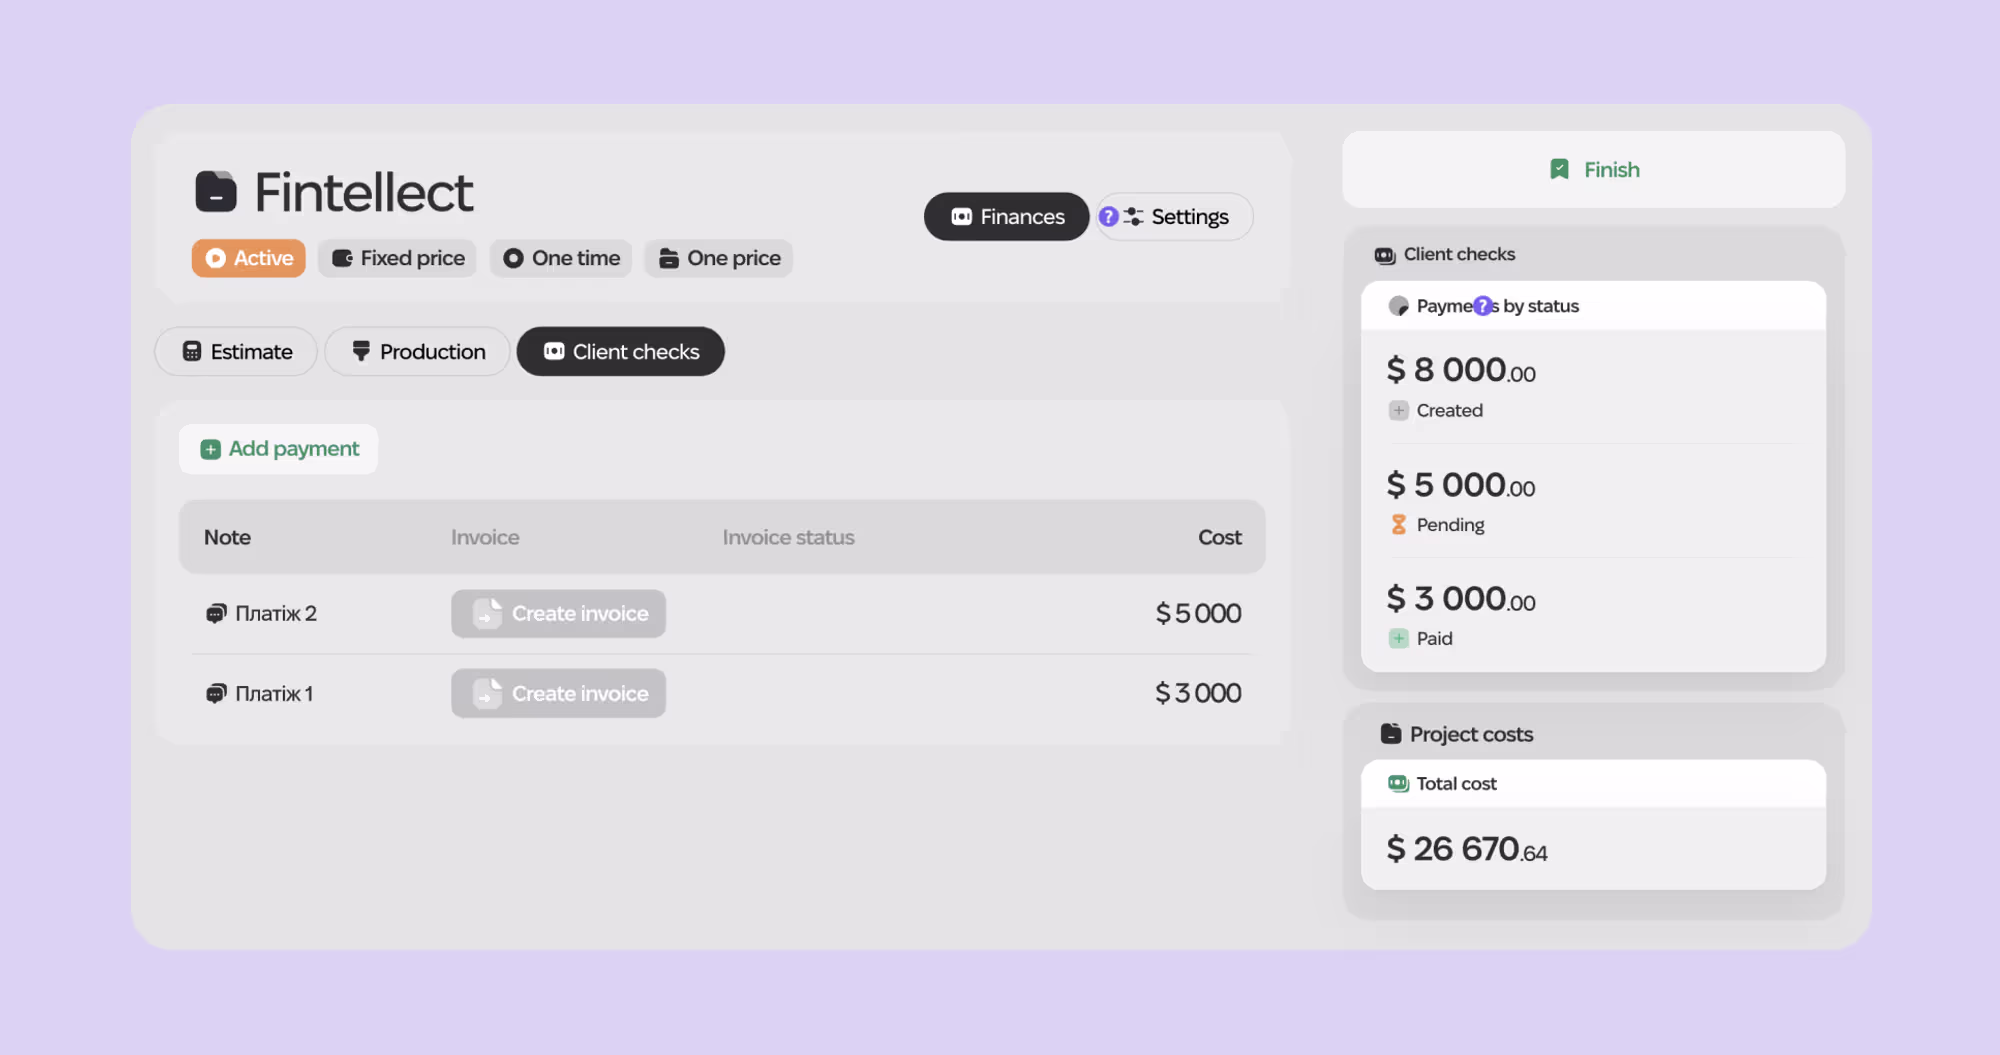
Project income is located in the Clients checks section. Go there to create client payments after activating the project.
Add a new payment. In the Note column, add its name.
In the Cost column, enter the amount.
You can also create an invoice for each payment immediately.
Change Statuses and Planned Payment Dates in the Plan
When adding payments to an active project, they automatically appear in the Plan.
Go to the Plan section.
Open the income category Project Income.
Find the corresponding payments — they will have the project label.
Change the payment status or planned date so the payments match the dates you expect to receive them.
Step 5: Connect Bank Accounts
In Fintellect, you can connect bank accounts and some payment systems to automatically import statements and balances. This will help you manage all transactions in one place.
5.1. Create Manual Wallets (Accounts)
For accounts that cannot be synchronized (cash, crypto), create manual wallets.
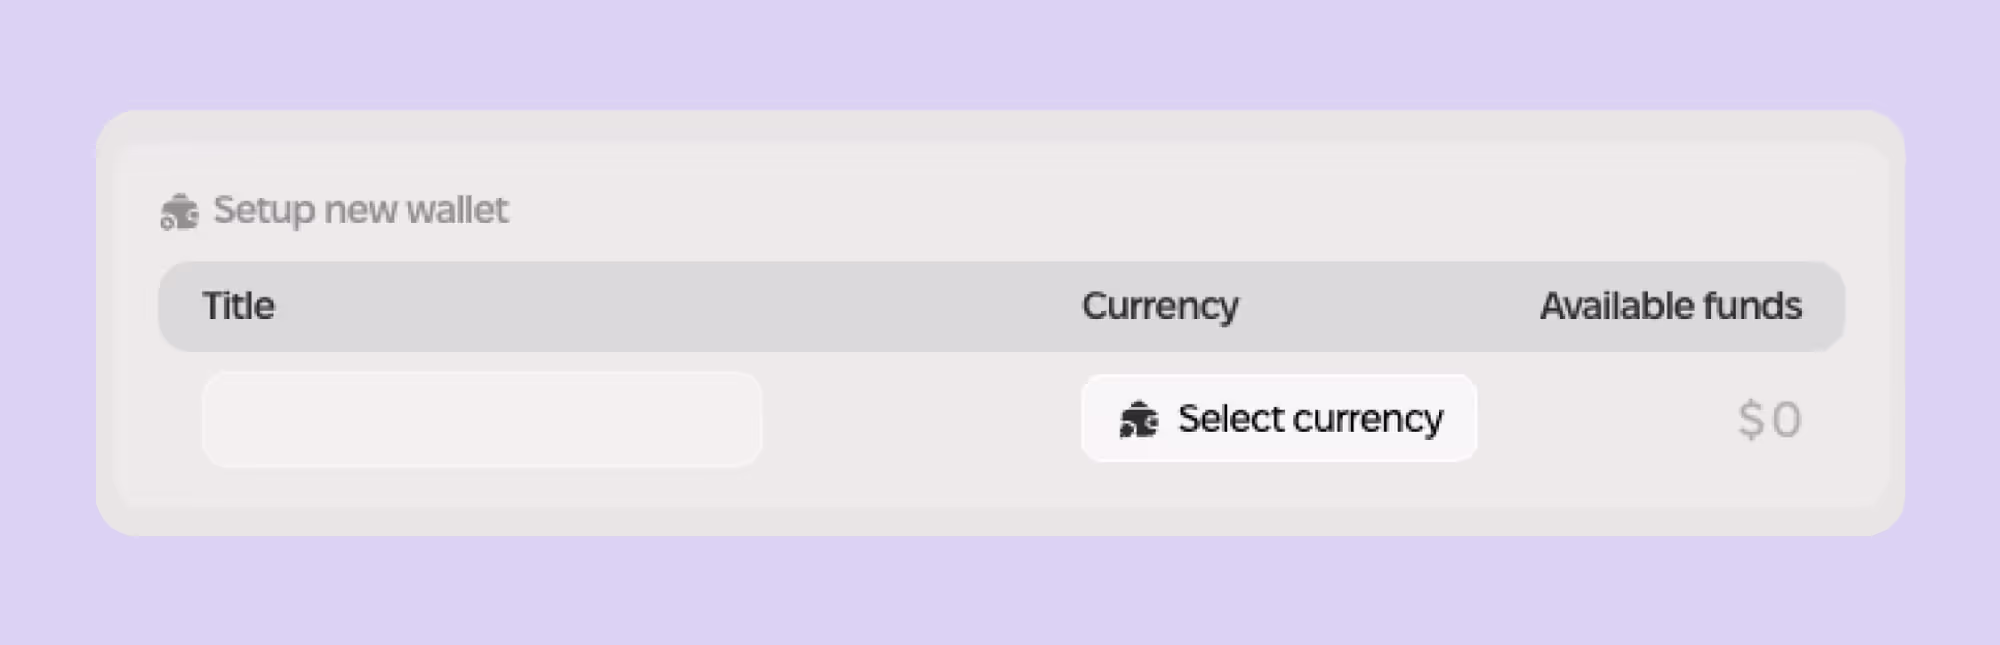
o to the Wallets section.
Click the “+” at the top of the screen.
Select “Manual.”
In pop-up that appears, enter the wallet name, select its currency, and enter the amount of funds available.
5.2. Synchronize Bank Accounts
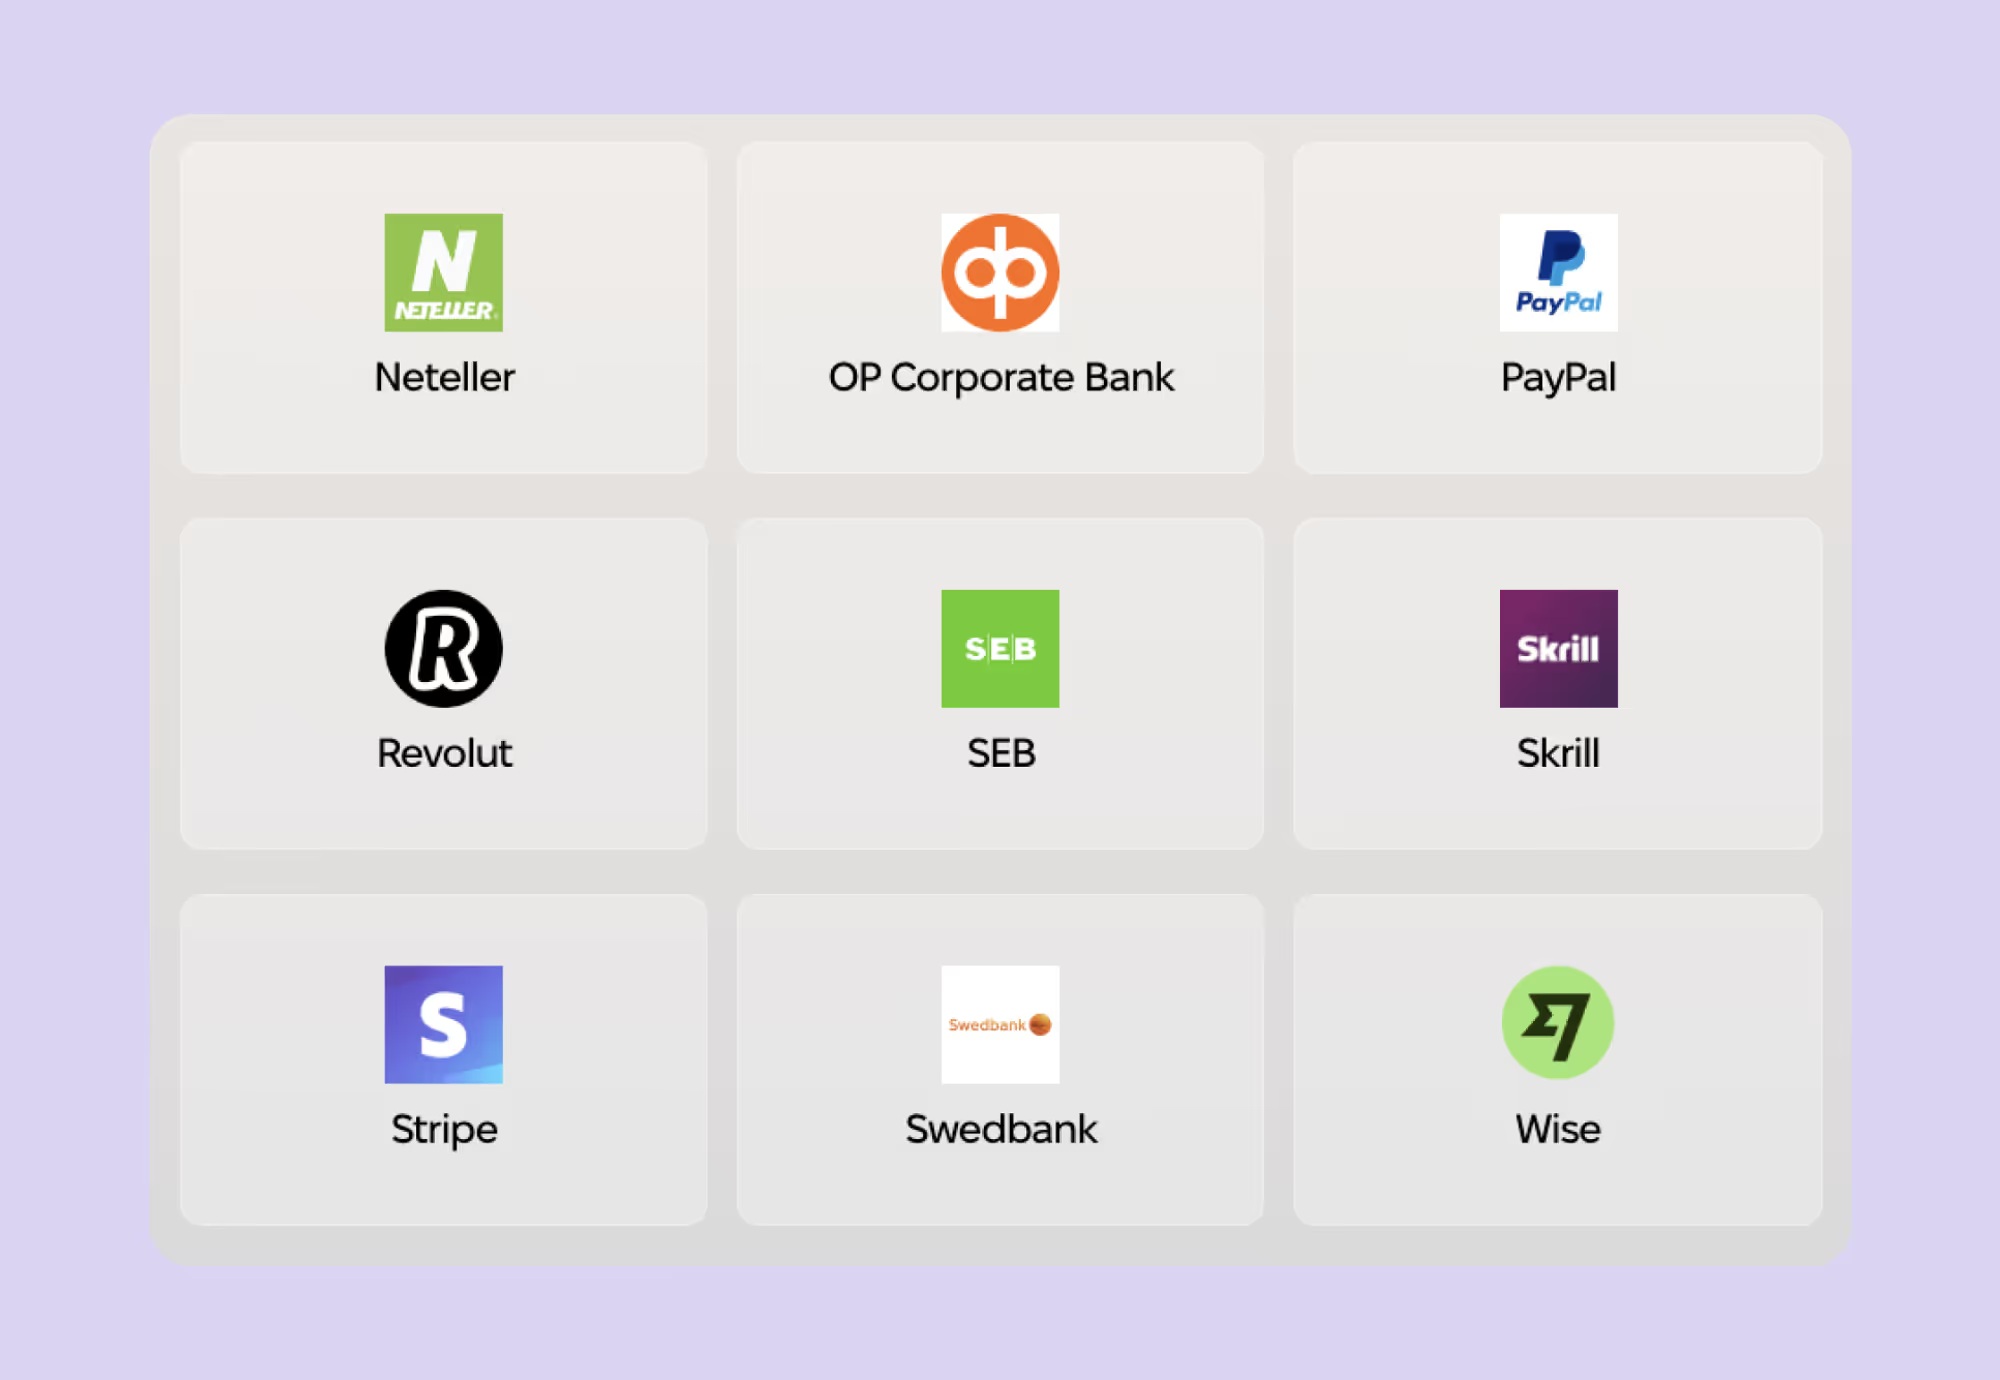
You can add any number of bank accounts or payment system accounts (PayPal, Stripe) to Fintellect. The balance and transactions on these accounts will be synchronized with Fintellect and displayed in Balance and Operations, respectively.
To add a synchronized account:
Go to the Wallets section.
Click the “+” at the top of the screen.
Select “Synched.”
Select the bank’s geography — EU or Ukraine. In Ukraine, only Monobank and Privatbank are available. If you need another Ukrainian bank, you can contact us, and we will add the most popular banks to the plan.
Select the country and find your bank.
Log into your account and grant Fintellect access to your data.
Select the date from which to add transactions to Fintellect.
The account is synchronized. It will appear in Wallets, and transactions will appear in Operations.
Most banks open the account connection window as a pop-up. Safari browser disables pop-ups by default, so after clicking Fetch transactions, nothing may happen. To display the pop-up, click the icon with two windows to the right of the address bar in Safari.
This is safe. Fintellect only adds statements from your accounts to the Operations section and synchronizes balances on accounts. We do not have access to your funds.
Step 6: Work with Cash Flow
6.1. What Are Operations
The “Operations” section is your statement. It contains all transactions from synchronized bank accounts and operations from manual accounts that you create yourself.

Components of Operations in the Statement
Expense or income category.
Target — the template related to this operation (e.g., a specific subcontractor).
Comment — in synchronized operations, you will see a payment comment, and in manual operations, you can add your own.
Account (synchronized or manual).
Amount.
Transactions from your bank statement are marked with a cyclical symbol ♻️. Manual transactions have no mark.
6.2. How to Work with Operations
How to Select the Statement Period
To select operations for a specific period, click on the calendar and choose the desired period — specific dates, calendar month, 30 days, today, last week, or all time.
How to Filter Operations
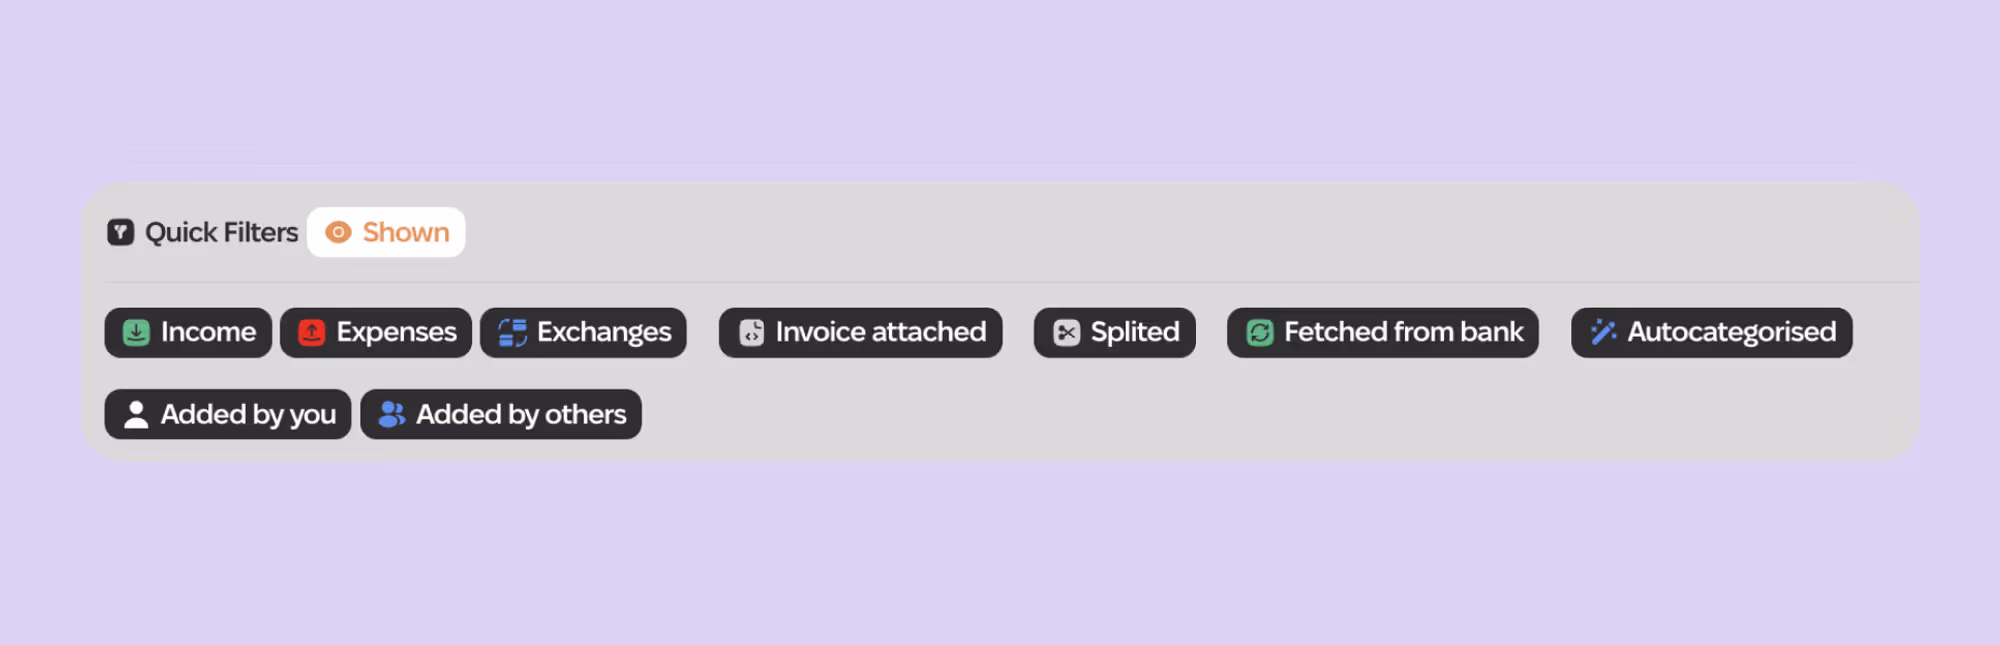
Choose quick filters to automatically sort operations.
How to Display Operations by Account
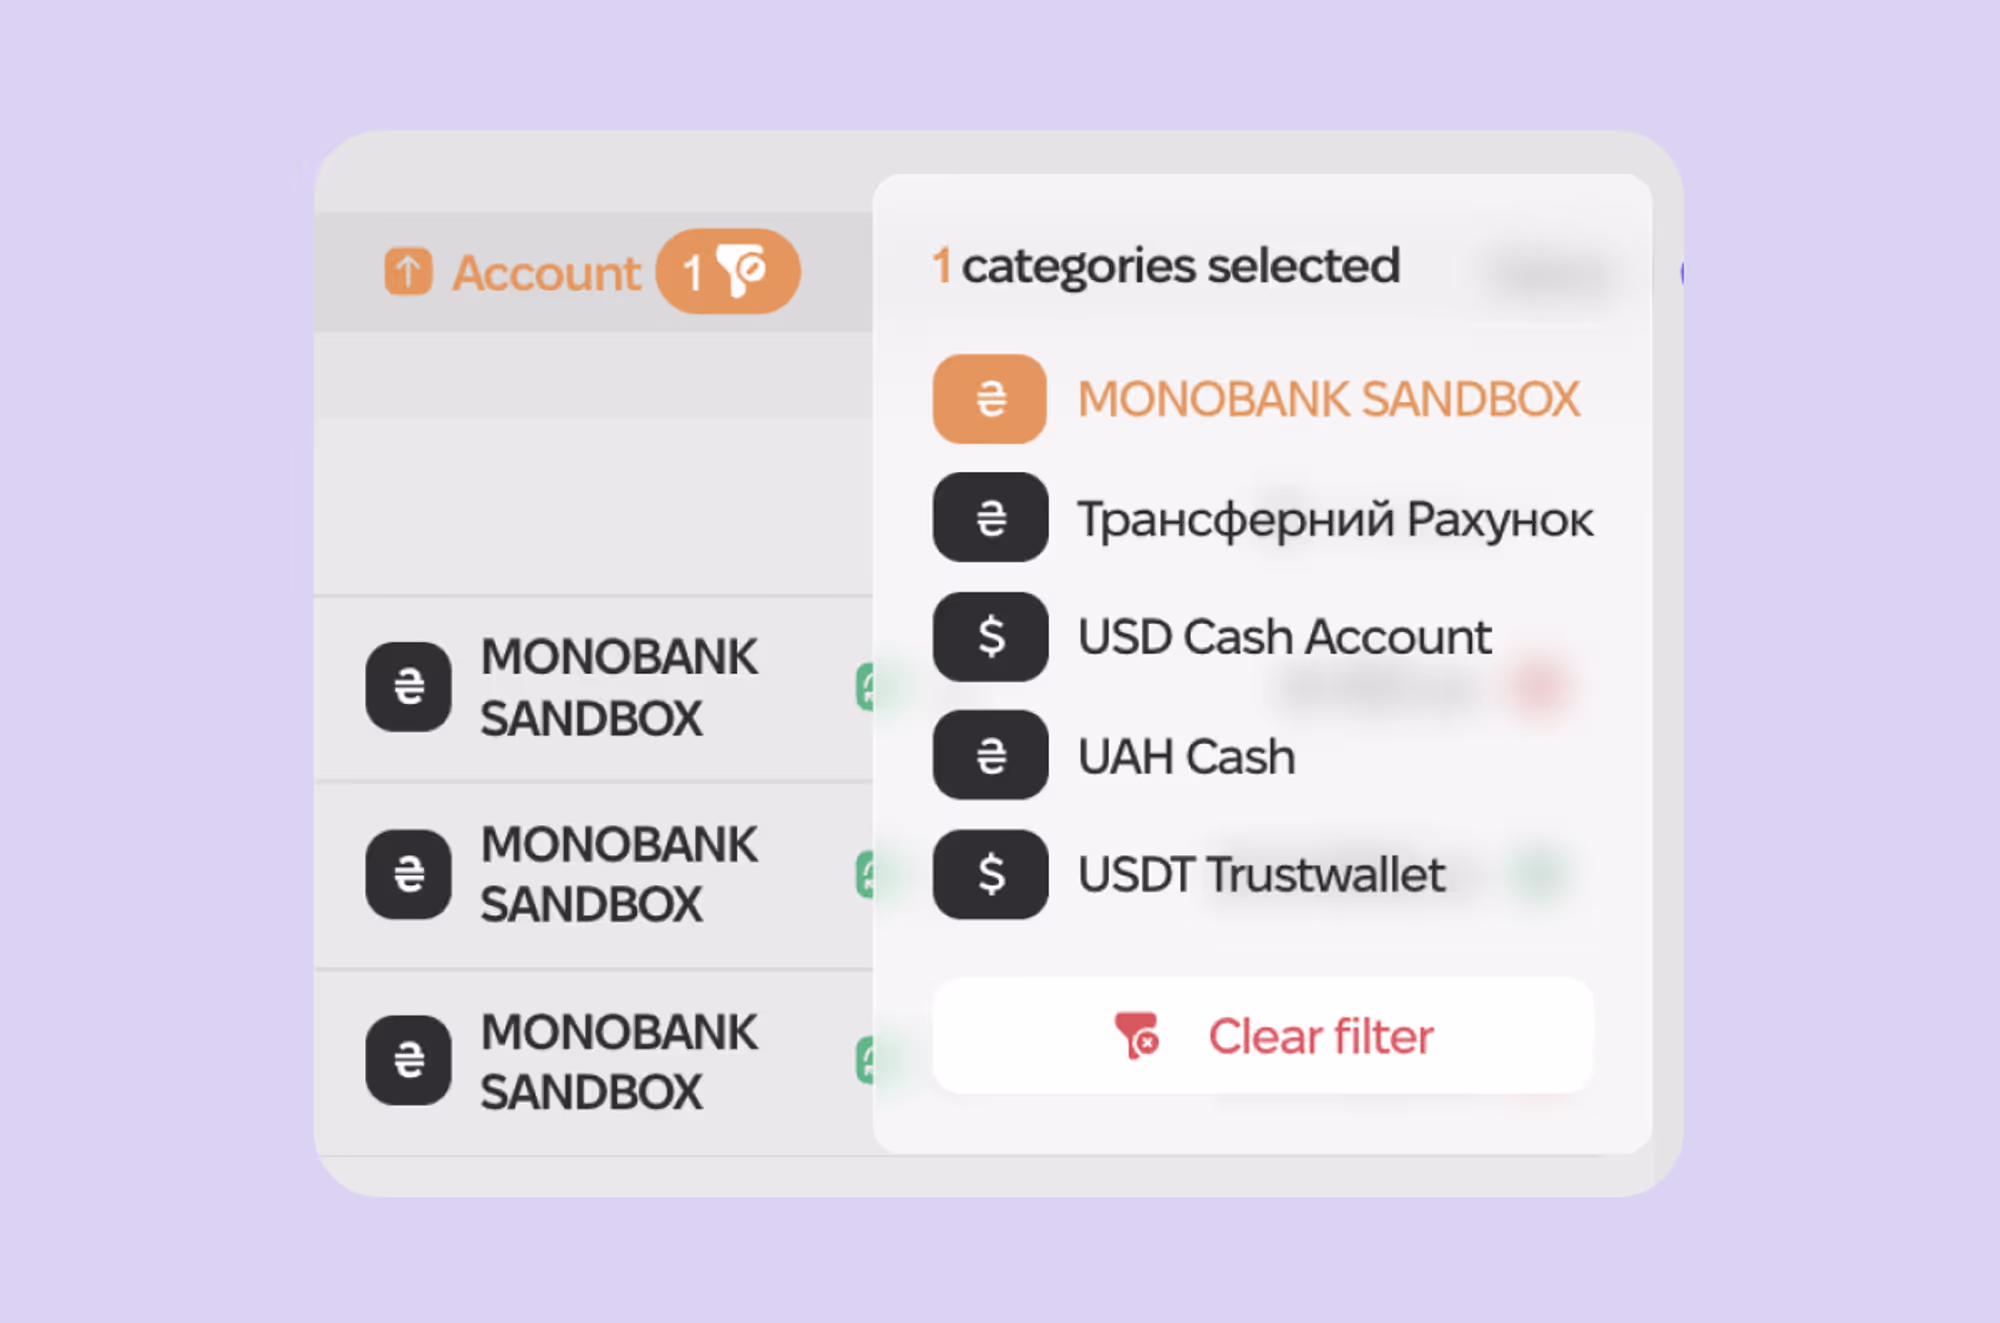
Click on the filter icon next to the Account column.
Select the account you need.
Fintellect will then display only operations in that account.
How to Split One Operation into Several
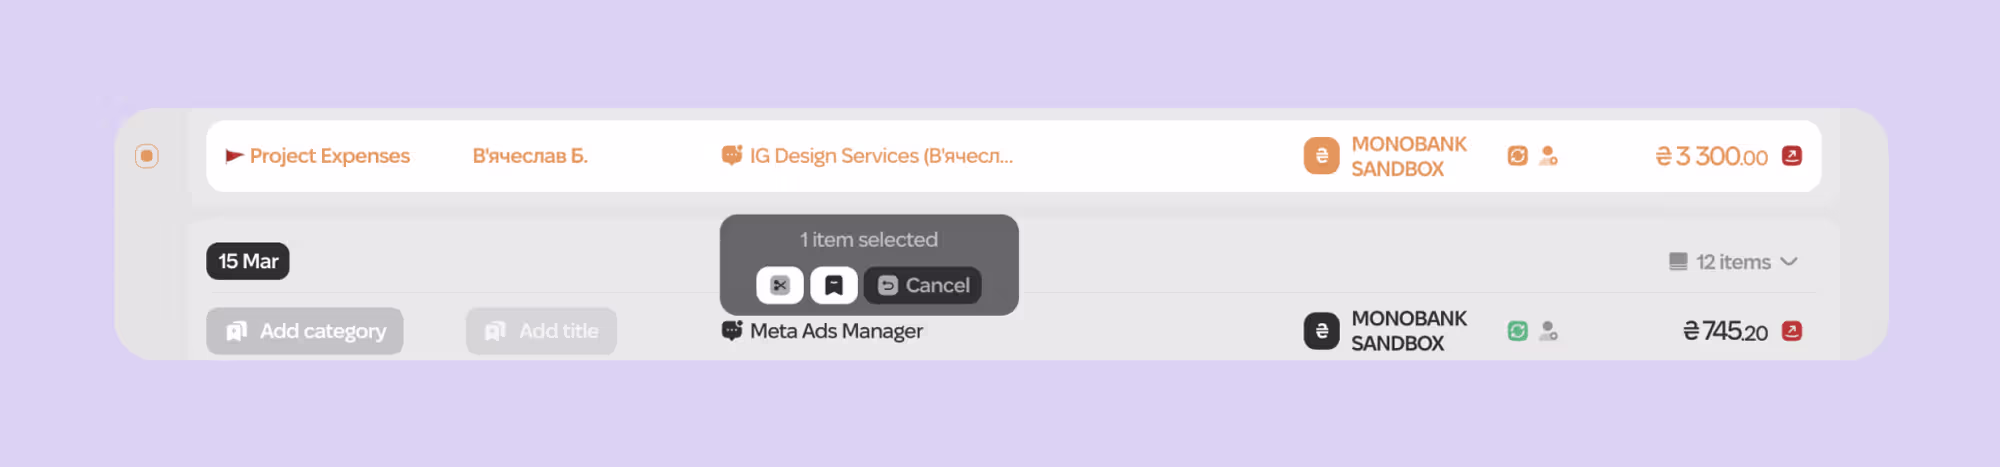
Select the operation using the round picker to the left of the category name.
In the bottom menu, select the scissors icon.
In the menu that appears, choose how many operations to split the selected one into, and add categories, descriptions, and amounts.
Finally, click Split.

How to Archive a Synchronized Operation
Select the operation using the round picker to the left of the category name.
In the bottom menu, select the flag icon.
Confirm the archiving of the operation, and it will disappear from the statement.
How to Create Transfers Between Your Accounts

A transfer is an operation between your accounts, such as cash withdrawal, currency exchange, or simply transferring from one account to another. A transfer does not count as an expense or income in the report.
To create a manual transfer, you need at least two manual accounts between which the transfer will be made.
If you create a transfer from synchronized accounts, select both operations, and in the bottom menu, click the “transfer” icon.
How to Add Manual Operations
To create a manual operation, add an expense, income, or transfer at the top of the Operations section.
Before creating operations, make sure you have at least one manual Wallet — without them, it is impossible to create an operation as you won’t be able to select the account related to the operation.
Then fill in all the operation fields:
Select a category.
Specify the target.
Add a comment.
Select a manual account.
Select the date (past or current).
Enter the amount.
Click the checkmark to save the operation.
After saving, the operation will be added to the statement and will accordingly change the Balance.
Fintellect offers many more features, but we will stop this guide here so you can explore them on your own. If you have any questions, contact our support or any communication channel convenient for you.
Wishing you profitable projects.
Stay tuned!


